
Event Planners: How to Weatherproof Outdoor Venues Without Damaging Surfaces

Updated: Sep 22
You've spent weeks perfecting every detail. The florals are stunning, the lighting is magical, and the caterer finally nailed that signature cocktail. Then your weather app buzzes: heavy rain expected Saturday afternoon.
Right when your 200-guest corporate gala kicks off.
If you've planned outdoor events long enough, you know this scenario isn't hypothetical—it's inevitable. And the real challenge isn't just keeping guests dry. It's protecting the venue itself from water damage while ensuring you don't leave behind a mess that costs you your deposit, your reputation, or both.
Most weatherproofing guides miss something critical: venue managers and property owners are increasingly strict about what you can and can't do to their spaces. Sandbags leave mud. Adhesive barriers strip paint. Tarps look terrible and blow away. You need solutions that work fast, hold up under pressure, and disappear without a trace when the event ends.
That's the balance we're tackling in this guide.
Why Weatherproofing Outdoor Venues Matters More Than Ever
Weather patterns have become increasingly unpredictable. According to the National Oceanic and Atmospheric Administration (NOAA), the frequency of heavy precipitation events has increased across most of the United States over the past several decades [1]. For event planners, this translates to more last-minute scrambles and higher stakes.
But the weather itself is only half the problem.
The Hidden Costs of Venue Damage
When water infiltrates a venue—seeping under tent sidewalls, pooling at pavilion entrances, or flooding into historic buildings—the consequences extend far beyond a soggy dance floor:
Security deposits: Many venues hold $5,000 to $25,000 or more against damage
Liability claims: Water damage to floors, walls, or electrical systems can trigger lawsuits
Reputation damage: One viral photo of a flooded wedding reception can tank your business
Relationship loss: Venue managers talk to each other, and word spreads fast
The irony? Many traditional weatherproofing methods cause the exact damage you're trying to prevent.
What Venue Managers Actually Care About
After speaking with venue coordinators across the industry, their concerns consistently boil down to three things:
No residue. Whatever you use must come off completely.
No surface damage. Paint, varnish, stone, wood—all must remain pristine.
Quick removal. They have another event in 24 hours. Your cleanup can't linger.
Miss any of these, and you're not coming back.
The Complete Weatherproofing Framework for Outdoor Events
Before diving into specific solutions, it helps to understand weatherproofing as a system rather than a single fix. Effective outdoor event protection addresses multiple challenges simultaneously.
Wind Management
Rain rarely falls straight down during storms. Wind-driven precipitation can soak guests even under covered structures. Effective wind management includes:
Tent weighting systems: Proper ballast prevents tent lift and creates stable shelter
Strategic windbreaks: Positioning barriers to redirect airflow without obstructing views
Sidewall tensioning: Taut sidewalls perform better than loose ones in gusty conditions
Flooring and Drainage
Water pooling creates slip hazards and damages hardscapes. Smart flooring strategies include:
Raised subflooring: Elevating event flooring even a few inches allows water to pass beneath
Drainage channels: Directing water away from high-traffic areas toward designated runoff points
Absorbent mats: Placing water-absorbing materials at entry transitions
Temperature Control
Weatherproofing isn't just about water. Maintaining guest comfort during weather contingencies requires:
Portable heating or cooling: Climate control for enclosed tent spaces
Ventilation planning: Preventing condensation buildup inside sealed structures
Backup power: Ensuring HVAC systems function if primary power fails
Water Sealing
This is where most events fail—and where the right tools make the biggest difference. Water finds every gap, crack, and unsealed threshold. Sealing these entry points requires materials that work quickly, hold firmly, and remove cleanly.

Common Weatherproofing Methods (And Why They Often Fall Short)
Before exploring better solutions, let's be honest about what doesn't work—or at least, what comes with serious trade-offs.
Sandbags
The old standby. Sandbags can divert water flow, but they're heavy, messy, and require significant labor to deploy. Worse, they leave behind sand, mud, and sometimes even mold spores. One venue manager described finding sand in her event space's HVAC system three months after an event. Not ideal.
Plastic Sheeting and Duct Tape
This combination might work for a backyard barbecue, but it fails professionally for two reasons. First, duct tape adhesive is notorious for leaving sticky residue or pulling paint right off surfaces. Second, plastic sheeting tears easily and can't create a true seal against water pressure.
Temporary Flood Barriers
Commercial flood barriers work well for some applications, but they're expensive, bulky to transport, and often require professional installation. Most event planners don't have the budget or logistics for these systems.
Weather Tents Without Proper Sealing
Even the best tent won't help if water pools at entry points or seeps under sidewalls. The tent keeps rain off guests' heads, but ground-level flooding requires separate solutions.
Strategic Sealing: Using Removable Flood Barriers
The key to effective venue weatherproofing lies in understanding where water actually enters and using the right materials to seal those specific points—without leaving evidence you were ever there.
Identify Your Vulnerability Points
Before any outdoor event, walk the venue during or after a rain and note where water collects or enters:
Door thresholds: Especially pavilion doors, barn entrances, and tent access points
Window bases: Historic venues with older windows are particularly vulnerable
Sidewall gaps: Where tent fabric meets hard surfaces
Drainage transitions: Where concrete meets grass or gravel meets pathways
Electrical access points: Water plus electricity equals disaster
Once you've mapped these zones, you can seal them strategically rather than trying to waterproof everything.

Removable Waterproof Tape: A Practical Option
For the water-sealing component specifically, FloodTape® offers a solution designed for exactly this challenge. It's an 8-inch wide, 20-foot long waterproof adhesive tape that seals gaps and keeps water out—then removes cleanly without residue or surface damage [2].
Originally developed for homeowners in flood-prone areas, event planners have discovered it solves a very specific problem: creating temporary, effective water barriers on surfaces you can't afford to damage.
Key characteristics:
Extra-wide coverage: At 8 inches wide, it seals door thresholds and gaps in a single strip—reducing installation time compared to narrower tapes requiring multiple passes
Multi-surface adhesion: Works on wood, glass, metal, stone, stucco, and vinyl—the exact materials you encounter at venues
Clean removal: The adhesive is designed to peel off without pulling paint or leaving sticky residue when removed properly
No tools required: Cut to length, peel, press, done
This matters because venue managers have seen too many events leave marks. When you can demonstrate your weatherproofing removes cleanly, you become the planner they trust with their premier dates.
Step-by-Step: Weatherproofing an Outdoor Venue
Here's a real-world application framework for a corporate gala at a historic estate with an attached pavilion.
Step 1: Assess and Clean Surfaces
Forty-eight hours before the event, inspect all potential water entry points. For any adhesive sealing product to work properly, surfaces must be dry and free of dust, dirt, and debris. Wipe down thresholds and frames with a dry cloth.
Pro tip: Take photos of all surfaces before applying anything. This protects you if any pre-existing damage is later attributed to your event.
Step 2: Seal Door Thresholds
Measure the width of each door threshold and cut your sealing tape to length, adding an extra 2 inches on each side. Peel back the protective film and press the tape firmly along the threshold, ensuring it creates a complete seal where the door meets the ground.
For double doors, overlap the tape at the center by at least 1 inch to prevent water from finding gaps.
Step 3: Address Window Bases on Ground-Level Structures
If your venue includes a historic building with ground-level windows, apply waterproof tape along the exterior base of each window frame. This prevents water from pooling against the glass and seeping inside through aging seals.
Step 4: Seal Tent-to-Surface Transitions
This is where most tent setups fail. Where tent sidewalls meet concrete, pavers, or building walls, create a continuous seal. Press the tape half onto the tent material and half onto the hard surface, overlapping sections by 1-2 inches.
Step 5: Protect Electrical Access Points
Any outdoor electrical boxes, extension cord entry points, or generator connections should be sealed. While waterproof tape isn't designed for submerged applications, it effectively keeps rain and pooling water from infiltrating these critical areas.
Step 6: Create Drainage Channels
Rather than fighting water, direct it. Use sealed pathways to guide water away from high-traffic areas and toward drainage points. This works especially well on slightly sloped surfaces.
The Removal Process: Why It Matters
When removing sealing tape after your event, technique matters:
Pull the tape back slowly toward you at a 45° angle or lower. This approach prevents the adhesive from grabbing and ensures clean separation from the surface. Don't yank or pull straight up—slow and steady preserves the surface beneath.
Most event planners report removal takes less time than application. And when you hand those venue keys back with zero evidence of your weatherproofing efforts? That's how you secure the next booking.

Before and After: Real Scenarios
Scenario 1: The Barn Wedding with Historic Wood Floors
Challenge: A rustic barn venue with original wood floors and a 6-inch gap under the main entrance doors. Previous events had used sandbags outside, but rainwater still pooled at the threshold and seeped onto the historic flooring.
Solution: The wedding planner applied FloodTape® along the interior threshold, creating a watertight seal. During the event, a 2-hour downpour hit. Water pooled outside but didn't cross the barrier.
Result: Post-event removal left the 150-year-old wood completely undamaged. The venue manager requested the product name for future recommendations.
Scenario 2: The Tented Corporate Gala on a Concrete Patio
Challenge: A 40x60 frame tent on a concrete patio adjacent to a client's headquarters. Sidewall gaps and the transition between tent and building created multiple water entry points during previous events.
Solution: The event team sealed all sidewall-to-concrete transitions and the tent-to-building junction using removable waterproof tape.
Result: When unexpected storms rolled through during cocktail hour, guests remained dry. The facilities manager was so impressed by the clean removal that he added the solution to his own emergency kit.
Scenario 3: The Waterfront Pavilion with Wind-Driven Rain
Challenge: An open-air pavilion on a harbor. High winds drove rain horizontally under the structure's overhang, soaking the welcome table and gift station at past events.
Solution: Temporary clear barriers were sealed to the pavilion's support columns using removable tape, creating wind breaks that didn't obstruct views.
Result: When removed, no residue remained on the whitewashed columns. The venue coordinator noted it was the first time that specific setup had survived a storm without water damage.
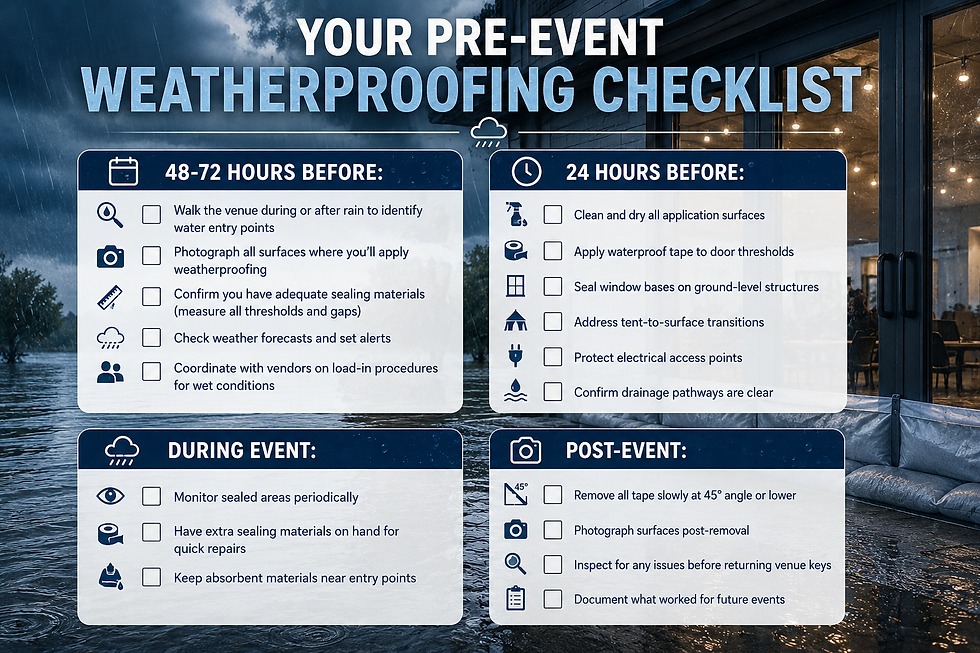
Your Pre-Event Weatherproofing Checklist
Print this and keep it in your event kit:
48-72 Hours Before:
[ ] Walk the venue during or after rain to identify water entry points
[ ] Photograph all surfaces where you'll apply weatherproofing
[ ] Confirm you have adequate sealing materials (measure all thresholds and gaps)
[ ] Check weather forecasts and set alerts
[ ] Coordinate with vendors on load-in procedures for wet conditions
24 Hours Before:
[ ] Clean and dry all application surfaces
[ ] Apply waterproof tape to door thresholds
[ ] Seal window bases on ground-level structures
[ ] Address tent-to-surface transitions
[ ] Protect electrical access points
[ ] Confirm drainage pathways are clear
During Event:
[ ] Monitor sealed areas periodically
[ ] Have extra sealing materials on hand for quick repairs
[ ] Keep absorbent materials near entry points
Post-Event:
[ ] Remove all tape slowly at 45° angle or lower
[ ] Photograph surfaces post-removal
[ ] Inspect for any issues before returning venue keys
[ ] Document what worked for future events
Weather Contingency Planning Beyond Sealing
Effective weatherproofing fits within a broader contingency framework. Consider these additional elements:
The Weather Call Timeline
Establish clear decision points with your client:
72 hours out: Monitor forecasts, alert vendors to potential changes
48 hours out: Confirm or adjust tent configurations, order additional supplies
24 hours out: Make final weather call, implement full weatherproofing protocol
Day of: Have backup plans ready for rapid deployment
Vendor Load-In During Wet Conditions
Coordinate with caterers, florists, and equipment vendors on:
Protected staging areas for sensitive items
Covered pathways for delivery
Timing adjustments to avoid peak precipitation
Guest Communication
Prepare weather-related messaging in advance:
Footwear recommendations
Arrival instructions for wet conditions
Indoor backup locations if applicable
Why This Matters for Your Business
Event planning is relationship-driven. Every venue manager you impress becomes a potential source of referrals. Every property you return in pristine condition strengthens your reputation.
Weatherproofing isn't glamorous—nobody hires you because your threshold sealing technique is legendary. But when rain hits and your event stays dry while the venue stays protected? That's the difference between a stressed client and a raving fan.
No single product solves every weather challenge. Severe flooding requires evacuation, not adhesive tape. But for the everyday reality of outdoor events—unexpected showers, pooling water, seeping moisture at entry points—having the right tools provides something valuable: a solution that works and then disappears.
Ready to add reliable weatherproofing to your professional event kit? Shop FloodTape® now and see how easy it is to protect venues without leaving a trace.
Frequently Asked Questions
Can removable waterproof tape be used on historic or delicate surfaces?
FloodTape® is designed to adhere strongly during use but remove cleanly without damaging surfaces. It works on wood, glass, metal, stone, stucco, and vinyl. For extremely delicate or irreplaceable surfaces, test a small inconspicuous area first. Many event planners use it successfully on historic venues because it leaves no residue and doesn't pull paint or finishes when removed properly—pull back slowly at a 45° angle or lower for best results.
How much sealing material do I need for a typical outdoor event?
A single roll of FloodTape® covers 20 linear feet of sealing. For a standard tent setup with two entrance doors and four sidewall transitions, plan for 2-3 rolls. Larger venues with multiple buildings or extensive perimeter sealing may require a 6-pack bundle. Measure your specific entry points and add 20% for overlapping and unexpected gaps.
What's the best way to remove waterproof tape without leaving marks?
Always pull the tape back slowly toward you at a 45° angle or lower. This technique allows the adhesive to release cleanly from the surface. Avoid yanking or pulling straight up, which can stress the adhesive bond. Removal typically takes less time than application when done correctly.
Does FloodTape® work in cold weather for winter events?
FloodTape® is designed to perform across a range of temperatures, including winter conditions. For events in colder climates, ensure surfaces are dry before application and allow slightly more time for the adhesive to set. The tape can help seal out moisture from melting snow and ice as effectively as it handles rain.
Can I reuse waterproof tape for multiple events?
FloodTape® is designed for single-use application. Once removed, the adhesive will not provide the same seal for a second application. For consistent, reliable weatherproofing, use fresh tape for each event. The cost of new tape is minimal compared to the risk of a compromised seal during a high-stakes event.
About FloodTape®
FloodTape® was invented by Matthias Herzog, a Florida resident who spent 15 years searching for a flood protection solution that was fast, effective, and didn't damage his home. After trying sandbags (heavy and messy), duct tape (left sticky residue and ruined paint), and silicone caulk (worked but impossible to fully remove)—all with frustrating results—he developed FloodTape® as a simple DIY system that seals out water and removes cleanly. The patent-pending technology has been tested in real hurricane conditions by homeowners across the United States, with customers reporting successful protection against significant water intrusion. FloodTape® is now trusted by homeowners, property managers, and event professionals who need reliable weatherproofing without surface damage.
Works Cited
[1] NOAA — "Climate Change Indicators: Heavy Precipitation." https://www.climate.gov/news-features/understanding-climate/climate-change-indicator-heavy-precipitation
[2] FloodTape® — "About FloodTape®." https://www.myfloodtape.com/about


Comments