
Protecting Churches, Schools, and Community Centers from Flood Damage

When floodwaters threaten a neighborhood, community buildings often take the hardest hit. Churches, schools, community centers, and nonprofit facilities serve as gathering places, emergency shelters, and lifelines for entire populations—yet many lack adequate flood protection. The consequences extend far beyond property damage: costly repairs, displaced services, and communities left without critical resources precisely when they need them most.
Protecting these vital buildings does not require expensive engineering projects or permanent structural modifications. With the right approach and tools like FloodTape®, facility managers, volunteers, and community leaders can implement effective flood protection quickly and affordably.
Key Takeaways:
Community buildings face unique flood vulnerabilities due to multiple entry points, aging infrastructure, and basement-level spaces
Just one inch of water can cause more than $25,000 in damage to a building
FloodTape® offers a temporary, affordable solution that removes cleanly without damaging historic finishes
A clear protection protocol can be implemented by volunteers with minimal training
Proactive preparation costs far less than reactive repairs

Why Community Building Flood Protection Matters Now
Community buildings face vulnerabilities that typical residential properties do not. These structures are often older, with aging infrastructure, multiple entry points, and basement-level spaces that serve essential functions. When water intrudes, the damage extends far beyond the building itself.
Consider what's at stake:
Historic churches may house irreplaceable artifacts, pipe organs, and archives spanning centuries
Schools contain expensive technology, educational materials, and serve as evacuation centers during emergencies
Community centers store food bank supplies, medical equipment, and critical records for vulnerable populations
Nonprofit facilities operate on tight budgets where even minor flood damage can threaten their entire mission
According to the Federal Emergency Management Agency, flooding remains the most common and costly natural disaster in the United States [1]. The National Flood Insurance Program reports that just one inch of water can cause more than $25,000 in damage to a building [2]. For nonprofits operating on limited margins, that kind of financial hit can be devastating.
The Growing Threat
Climate patterns are shifting, and what was once considered a "100-year flood" now occurs with increasing regularity. The National Oceanic and Atmospheric Administration has documented significant increases in heavy precipitation events across most of the United States over the past several decades [3]. Urban areas face additional challenges as development increases impervious surfaces, directing more stormwater toward existing structures.
Community buildings in flood-prone regions—near rivers, in coastal areas, or in low-lying urban zones—face mounting risk. Yet many rely on reactive measures rather than proactive protection.
Common Vulnerabilities in Community Buildings
Understanding where water typically enters these structures is the first step toward effective protection. Most community buildings share similar weak points:
Exterior Doors and Thresholds
Large entry doors with aging weather stripping create prime entry points for floodwater. Many community buildings feature multiple exterior doors—main entrances, side exits, basement access points—each representing a potential breach.
Basement Windows and Wells
Below-grade spaces are especially vulnerable. Window wells collect water during heavy rains, and aging seals around basement windows often fail under pressure.
Loading Docks and Service Entrances
Churches with fellowship halls, schools with cafeterias, and community centers with storage areas often have service entrances designed for accessibility rather than water resistance.
HVAC Penetrations and Utility Access Points
Gaps around pipes, conduits, and mechanical equipment provide pathways for water intrusion that often go unnoticed until damage occurs.
Garage Doors and Vehicle Access
Many facilities have attached garages or covered drop-off areas where large door openings create significant flood risk.

Comparing Temporary Flood Protection Options
Before selecting a protection method, facility managers should understand the available alternatives. Each approach has distinct advantages and limitations:
Method | Installation Time | Labor Required | Surface Damage Risk | Cost | Best For |
Sandbags | 2-4 hours | High (heavy lifting) | Low | Low-Medium | Diverting water flow |
Water-inflated barriers | 30-60 minutes | Medium | Low | Medium | Perimeter protection |
Flood panels/doors | Requires pre-installation | Low (once installed) | None | High | Permanent installations |
FloodTape® | 15-30 minutes per opening | Low | None | Medium | Sealing entry points |
Sandbags remain widely available but require significant labor to deploy and dispose. They work best for diverting water flow rather than creating watertight seals around doors and windows.
Water-inflated barriers (such as Quick Dam products) absorb water to create temporary dams. These work well for blocking larger areas but typically protect only 3-4 inches of water height when used individually [4].
Permanent flood panels and doors offer excellent protection but require substantial capital investment and professional installation—often impractical for nonprofits with limited budgets.
FloodTape® fills a specific gap in the market: creating watertight seals around doors, windows, and other entry points without requiring heavy labor, permanent modifications, or multiple products.
Using FloodTape® for Community Building Protection
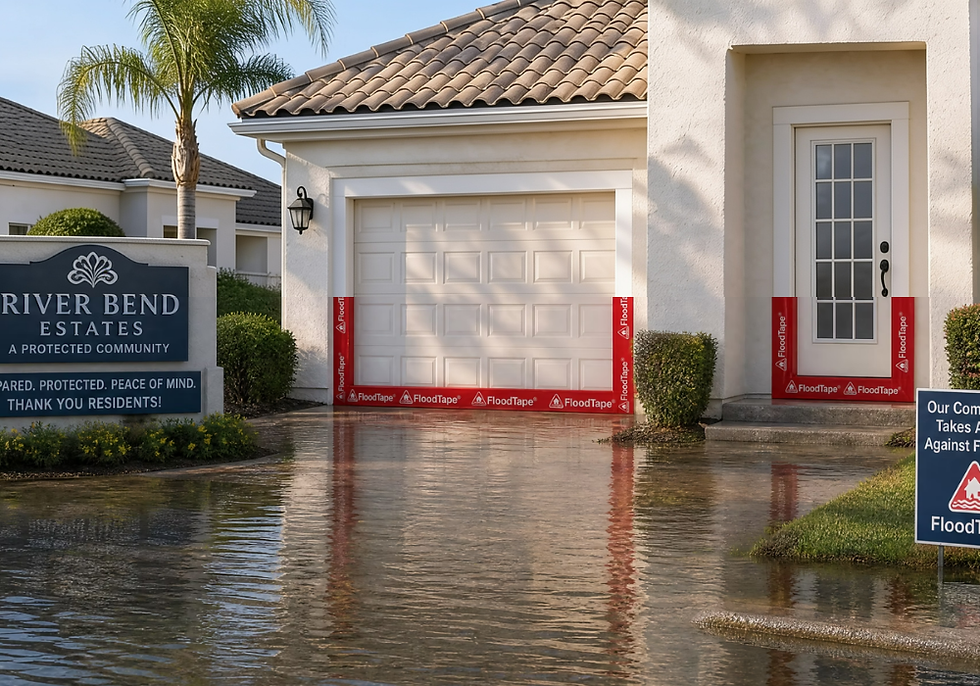
FloodTape® is an 8-inch wide, 20-foot long waterproof adhesive tape specifically designed for temporary flood protection. It adheres to wood, glass, metal, stucco, vinyl, and stone, creating a watertight seal that can be removed cleanly without damaging paint or underlying surfaces [5].
For volunteer-driven organizations with limited resources, this accessibility matters significantly.
Step-by-Step Protection Protocol
Step 1: Assessment and Inventory
Walk through your building and identify every potential water entry point. Document:
All exterior door locations and dimensions
Basement windows and their current condition
Service entrances and loading areas
Low-lying windows on the ground floor
Any previous water intrusion history
Step 2: Surface Preparation
For optimal adhesion, surfaces must be clean and completely dry. Before storm threats materialize:
Remove dirt, dust, and debris from door frames and thresholds
Wipe down surfaces with a dry cloth
Ensure areas are free from moisture
Note any damaged surfaces that may need attention
Step 3: Calculate Material Needs
Measure the linear footage around each opening you plan to protect. A standard exterior door requires approximately 16-20 linear feet of tape coverage. For larger community buildings, the 6-pack bundle provides 120 feet of protection—typically enough to seal 6-8 standard door openings.
Step 4: Application Process
When flood warnings are issued:
Starting at one corner of the door frame, apply FloodTape® along the base of the threshold
Press firmly to create a tight seal against both the floor and the door
Continue up each side of the frame, overlapping sections by at least 2 inches
Seal across the top if water levels may reach that height
For basement windows, cover the entire window well opening, extending tape onto surrounding walls
Step 5: Inspection and Reinforcement
Walk through all protected areas and check:
Are all seams properly overlapped?
Is the tape firmly adhered along its entire length?
Are there any gaps at corners or irregular surfaces?
Apply additional tape as needed to address any weak points.
Removal Instructions
Proper removal technique ensures clean removal without surface damage. Pull the tape back slowly toward you at a 45-degree angle or lower. This gradual approach allows the adhesive to release cleanly rather than pulling at finishes. Avoid yanking or tearing the tape quickly, as this can stress both the tape and the underlying surface.

Hypothetical Scenarios: What Protection Looks Like in Practice
The following scenarios illustrate how FloodTape® might perform in typical community building situations. Individual results depend on installation technique, flood conditions, and building characteristics.
Scenario 1: Historic Church with Basement Fellowship Hall
Before protection plan: A 120-year-old church in a river valley relies on sandbags stacked by elderly volunteers before each flood warning. The process takes 8-10 hours, leaves volunteers exhausted, and still results in seepage around door edges.
After implementing FloodTape®: Facility leadership stocks six rolls in their emergency supplies. During the next flood warning, three volunteers seal all basement access points in under 90 minutes. The tape creates a barrier around door frames where sandbags previously failed to seal completely. Removal takes 20 minutes, with the century-old door frames remaining undamaged.
Scenario 2: Elementary School Serving as Emergency Shelter
Before protection plan: A coastal elementary school designated as an emergency shelter faces a recurring problem: even minor flooding through the cafeteria service entrance makes the facility unusable for shelter operations precisely when the community needs it most.
After implementing FloodTape®: Staff apply FloodTape® to the service entrance, loading dock, and three ground-floor exterior doors as standard hurricane preparation protocol. The sealed entry points prevent water intrusion during storm events, allowing the school to fulfill its role as a community shelter.
Scenario 3: Community Food Bank in Urban Flood Zone
Before protection plan: A community food bank operating from a converted warehouse loses significant donated food supplies when flash flooding overwhelms a single-door sandbag barrier.
After implementing FloodTape®: With FloodTape® sealing the main entrance, two side doors, and a basement storage access point, the facility gains protection for its inventory. The investment in protection materials costs a fraction of potential inventory losses.
Your Community Building Flood Protection Checklist
Use this checklist to assess and improve your facility's flood readiness:
Assessment Phase
[ ] Identify all exterior doors and rate their flood vulnerability (high/medium/low)
[ ] Document basement windows and below-grade openings
[ ] Note service entrances, loading docks, and large door openings
[ ] Review past flooding history and identify problem areas
[ ] Measure linear footage needed for complete protection
Preparation Phase
[ ] Stock adequate FloodTape® supply (minimum: enough for all high-risk openings)
[ ] Store materials in accessible, dry location with clear labeling
[ ] Train multiple staff/volunteers on application procedures
[ ] Create a written emergency protocol specifying who does what
[ ] Establish communication chain for storm warnings
Pre-Event Phase
[ ] Monitor weather forecasts and flood warnings
[ ] Activate protection protocol when warnings are issued
[ ] Clean and dry all surfaces to be protected
[ ] Apply FloodTape® to all identified entry points
[ ] Inspect all seals and reinforce as needed
[ ] Document application with photos for insurance purposes
Post-Event Phase
[ ] Inspect exterior before removing protection
[ ] Remove tape slowly at 45-degree angle to prevent surface damage
[ ] Document any water intrusion for future planning
[ ] Replenish FloodTape® supplies immediately
[ ] Debrief with team on what worked and what could improve

Special Considerations for Different Building Types
Historic Structures
Older buildings often feature irreplaceable finishes, original hardware, and materials that cannot be replicated. FloodTape® offers particular advantages here because it removes without damaging paint, varnish, or wood finishes. For buildings listed on historic registries, this non-destructive approach may be essential for maintaining compliance with preservation standards.
The National Park Service's guidelines for historic preservation emphasize using reversible interventions whenever possible—temporary flood protection that leaves no trace aligns with this principle.
Multi-Use Facilities
Buildings that serve multiple functions—a church that houses a daycare, a school that doubles as a community recreation center—need protection protocols that account for varying schedules and access requirements. Consider pre-positioning FloodTape® supplies in multiple locations and training staff across all programs in application procedures.
Buildings with Limited Volunteer Support
Many community organizations rely on aging volunteer bases or skeleton staffing. FloodTape®'s straightforward application process means even a single person can protect a standard door opening in minutes without heavy lifting or specialized skills. This accessibility makes it practical for under-resourced organizations.
Compliance Considerations
Facility managers should verify that temporary flood barriers do not interfere with required fire exits or evacuation routes. Doors sealed with FloodTape® should not be designated emergency exits while the tape is in place. Coordinate with local fire marshals if questions arise about compliance with building safety codes.
Insurance and Documentation
Documenting your flood protection efforts may support insurance claims and demonstrate due diligence:
Before storms: Photograph all sealed entry points with timestamps
After events: Document any water intrusion (or lack thereof) with photos and written notes
Maintain records: Keep receipts for protection materials and logs of preparation activities
Some insurance policies offer premium considerations for properties that implement documented flood mitigation measures. Contact your insurance provider to understand how temporary flood protection might affect your coverage or claims process.
The Broader Picture: Community Resilience
When community buildings flood, the impact ripples outward. Churches cancel services that provide social connection for isolated seniors. Schools close, leaving working parents scrambling for childcare. Food banks suspend operations when vulnerable families need them most. Community centers shut their doors to the very people seeking shelter.
Protecting these critical buildings is about maintaining the social infrastructure that holds communities together during crises.
The practical reality: effective protection is achievable. By understanding vulnerabilities, implementing solutions like FloodTape®, and establishing clear protocols, community organizations can reduce their flood risk without straining already-limited budgets.
Take Action Before the Next Storm
Every community building should have a flood protection plan in place before warnings are issued. Waiting until water is rising means scrambling for supplies, making rushed decisions, and often watching helplessly as damage occurs.
Start by assessing your facility's vulnerabilities using the checklist above. Calculate how much FloodTape® you need to protect your highest-risk entry points. Stock your supplies now, while there's time to plan rather than react.
Ready to protect your community building? Shop FloodTape® now and ensure your church, school, or community center is prepared for whatever the weather brings.
Frequently Asked Questions
How much FloodTape® does a typical community building need?
Coverage requirements depend on the number and size of entry points you're protecting. A standard exterior door requires approximately 16-20 linear feet of tape. For a building with 6-8 doors, the 6-pack bundle (120 total feet) typically provides adequate coverage. Larger facilities with multiple basement windows and service entrances may need additional rolls. Measure your specific entry points and add 15-20% extra for overlapping seams and reinforcement.
Will FloodTape® damage historic finishes or antique doors?
FloodTape® is designed to remove cleanly without damaging paint, varnish, or underlying surfaces. This makes it suitable for historic structures where preserving original finishes is essential. The key is proper removal technique—pull the tape back slowly at a 45-degree angle rather than pulling quickly. Many older buildings have used FloodTape® successfully without surface damage.
Can volunteers apply FloodTape® effectively without special training?
Yes. FloodTape® requires no special tools or technical expertise. The application process is straightforward: ensure surfaces are clean and dry, apply the tape firmly along door frames and thresholds, and overlap sections by at least 2 inches. Most volunteers can learn the process in a brief demonstration. Consider creating a simple photo guide specific to your building's entry points for reference during emergencies.
How long can FloodTape® remain in place during an extended flood event?
FloodTape® is designed for temporary deployment during flood threats. It should be removed once the flood threat has passed. For storage, FloodTape® maintains its effectiveness for up to 24 months when kept in a cool, dry location. Inspect your supplies periodically and replenish as needed before storm season.
Does temporary flood protection affect NFIP insurance claims?
Temporary flood barriers like FloodTape® generally do not affect your National Flood Insurance Program coverage. However, documenting your protection efforts with photos and records may support claims by demonstrating you took reasonable steps to mitigate damage. Contact your insurance provider for specific guidance regarding your policy.
About This Guide
This guide was developed using expertise in flood preparedness, building protection, and community resilience planning. FloodTape® was invented by Matthias Herzog, a Florida resident who experienced countless storm surges over 15 years of coastal living. After finding that existing solutions were either too labor-intensive, ineffective, or damaged surfaces upon removal, he developed FloodTape® as a simple, effective, DIY flood protection system. The product is designed, tested, and refined based on real-world flooding experiences in hurricane-prone regions.
Cited Works
[1] Federal Emergency Management Agency — "Flood Insurance." https://www.fema.gov/flood-insurance
[2] National Flood Insurance Program — "The Cost of Flooding." https://www.floodsmart.gov/why/the-cost-of-flooding
[3] National Oceanic and Atmospheric Administration — "Climate Change Indicators: Heavy Precipitation." https://www.epa.gov/climate-indicators/climate-change-indicators-heavy-precipitation
[4] Uline — "Quick Dam Flood Barriers." https://www.uline.com/Product/Detail/S-23687/Sandbags/Quick-Dam-Flood-Barriers-6-x-17
[5] FloodTape® — "FAQs for FloodTape®." https://www.myfloodtape.com/faq


Comments