
How to Protect Pet Areas and Indoor Kennels from Drafts and Moisture

Updated: Oct 1
That corner of the mudroom where your dog sleeps? It feels like a refrigerator every winter. Or maybe you run a small boarding facility and watch heat escape through garage-door gaps faster than your thermostat can compensate. Either way, your pets are uncomfortable, your energy bills keep climbing, and the weatherproofing methods that work elsewhere in your home don't quite fit these spaces.
Pet areas present challenges that standard solutions weren't designed for. Constant foot traffic (both human and four-legged), the need for easy cleaning, and surfaces ranging from concrete to chain-link all complicate the equation. Protecting pet areas and indoor kennels from drafts and moisture takes a different approach entirely.
You don't need expensive HVAC modifications or permanent construction to fix this. Below, you'll find exactly how to identify problem areas, seal them effectively, and create a comfortable environment for your animals—whether you're a homeowner with a dedicated dog room or operating a boarding facility.
Why Pet Spaces Are Especially Vulnerable
Pet areas typically occupy the "in-between" zones of homes and businesses. Mudrooms, converted garages, basement corners, and purpose-built kennel facilities share something in common: they're transitional spaces that weren't originally designed for climate control.
According to the U.S. Department of Energy, air leaks around doors and windows can account for 25-30% of heating and cooling energy use in typical buildings [1]. In pet areas—which often feature multiple entry points, concrete floors, and less insulation than living spaces—that percentage climbs higher.
Beyond energy costs, drafts and moisture create real problems for animal health:
Temperature swings stress animals and can weaken immune systems, particularly in senior pets or those recovering from illness [2]
Moisture infiltration promotes mold and mildew growth, creating respiratory hazards for pets and humans alike
Cold floors pull heat away from resting animals, forcing their bodies to work harder to maintain core temperature
Humidity imbalances can trigger skin conditions and make bedding damp
For boarding facilities, doggy daycares, and groomers, these issues directly affect business. Clients notice when their pets come home smelling musty or seem stressed from temperature discomfort. Veterinary clinics face similar concerns in recovery and holding areas.
Where Drafts and Moisture Sneak In
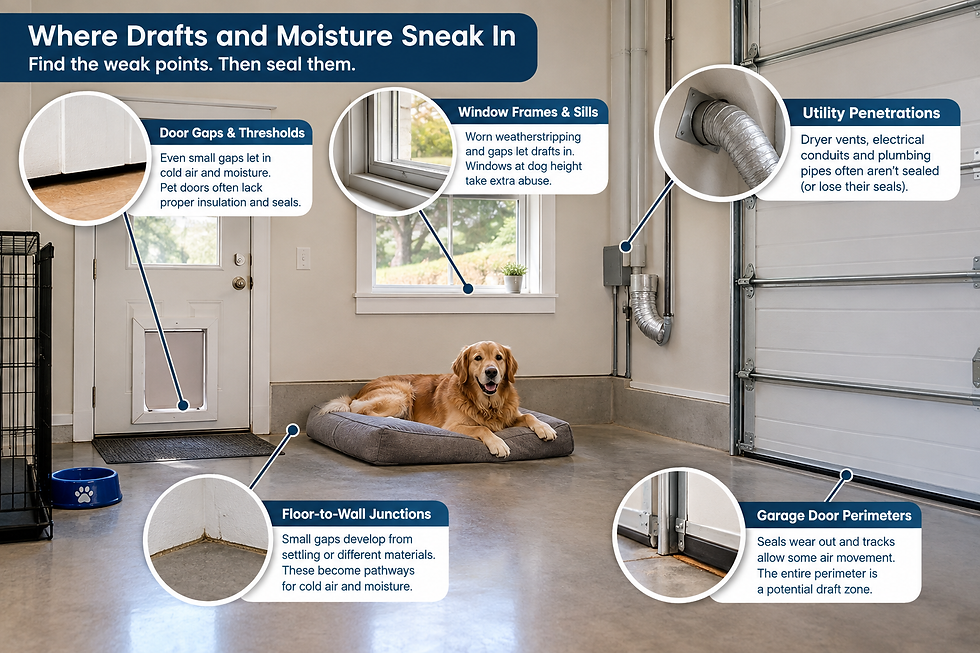
Before solving the problem, you need to find it. Pet areas have predictable weak points.
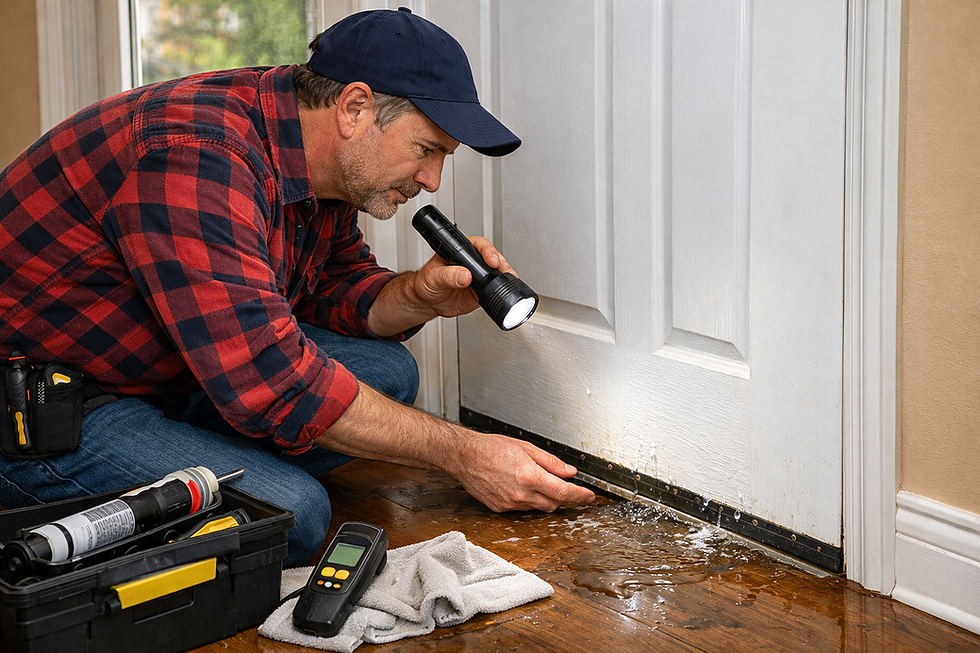
Door Gaps and Thresholds
The bottom of doors—especially those leading to garages, outdoor runs, or unheated spaces—often have significant gaps. Even a quarter-inch gap under a standard 36-inch door creates roughly 9 square inches of air exchange. That's equivalent to leaving a small window cracked open around the clock.
Pet doors compound this. Most flap-style pet doors provide minimal insulation, and the surrounding frame often lacks proper sealing.
Window Frames and Sills
Older windows in converted spaces may have deteriorated weatherstripping or gaps where the frame meets the wall. In kennel facilities, windows positioned at dog height take abuse from curious noses and paws, breaking seals over time.
Floor-to-Wall Junctions
Where concrete or tile floors meet walls, small gaps frequently develop due to settling or different expansion rates between materials. These gaps become pathways for cold air and moisture wicking up from slabs.
Utility Penetrations
Dryer vents, electrical conduits, and plumbing pipes passing through walls create openings that rarely get properly sealed during installation—or lose their seals over time.
Garage Door Perimeters
For pet areas in converted garages or kennel facilities with roll-up doors, the entire perimeter represents a potential draft zone. Garage door seals wear out, and track systems inherently allow some air movement.
How to Find the Leaks
You don't need expensive equipment to detect drafts. On a cold, windy day:
Turn off HVAC systems and fans in the space
Light an incense stick or candle
Slowly move it along edges of doors, windows, floor junctions, and other suspected entry points
Watch the smoke—horizontal movement or flickering indicates air infiltration
For moisture detection, look for:
Discoloration or staining on walls near the floor
Efflorescence (white mineral deposits) on concrete
Condensation on windows or metal surfaces
Musty odors, especially after rain
Mark problem areas with painter's tape so you can address them systematically.
Why Standard Weatherproofing Often Fails in Pet Spaces
Traditional methods don't hold up well in pet environments.
Caulk and expanding foam create permanent seals that work well in living spaces. But pet areas often need flexibility—removing barriers for cleaning, adjusting for seasonal changes, or reconfiguring kennel layouts. Permanent solutions become liabilities. They're also difficult to apply neatly on textured surfaces like stucco or concrete block.
Traditional weatherstripping degrades quickly under pet traffic. Door sweeps get chewed. Foam tape compresses and loses effectiveness. Rubber gaskets dry out and crack with the temperature fluctuations common to transitional spaces.
Draft stoppers and door snakes shift out of position constantly (especially with pet traffic), create tripping hazards, and do nothing for the sides or tops of doors.
A Different Approach: Removable Sealing Tape
For pet areas specifically, a removable waterproof tape offers advantages permanent fixes can't match:
Flexibility: Remove and reposition as needs change without damaging surfaces
Durability: Industrial-grade adhesive holds up to temperature swings and humidity
Multi-surface compatibility: Adheres to wood, metal, concrete, stucco, glass, and vinyl
Easy maintenance: Peel off for deep cleaning, then reapply fresh tape
Clean removal: Quality removable tapes leave surfaces intact when taken off properly
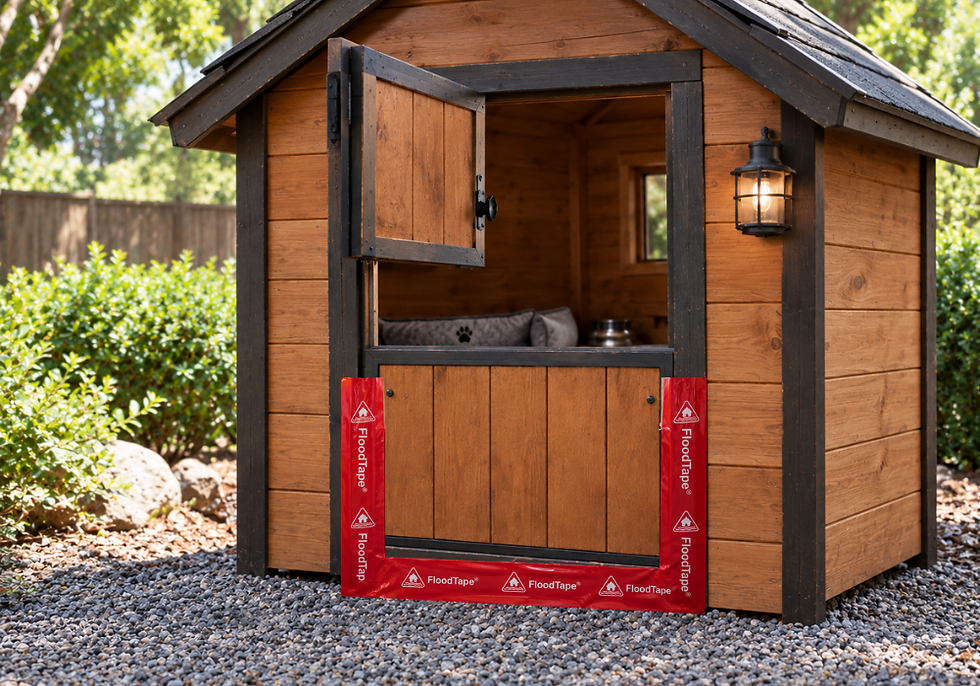
FloodTape® was originally designed to seal doors and windows against floodwater, but homeowners and kennel operators have found it effective for draft and moisture control in pet spaces. The 8-inch width covers large gaps in a single application, and the waterproof construction blocks both air and moisture infiltration.
Step-by-Step: Sealing Your Pet Area
What You'll Need
FloodTape® (one 20-foot roll typically covers 2-3 standard doors or equivalent window/floor applications)
Clean rags and rubbing alcohol or all-purpose cleaner
Scissors or utility knife
Tape measure
Painter's tape for marking (optional)
Preparing Surfaces
Proper surface preparation makes the difference between a seal that holds and one that fails:
Clean thoroughly. Remove all dust, dirt, pet hair, and debris. Wipe down with rubbing alcohol and allow to dry completely.
Check for moisture. Surfaces must be dry. If sealing after rain, use a fan or wait for natural drying.
Test temperature. For optimal adhesion, apply when surface and tape are above 50°F (10°C).
Remove loose material. Scrape away any flaking paint or coatings that could cause the tape to lift.
Sealing Door Thresholds
This is where most pet area heat loss occurs. The goal is to seal the gap between floor and door without preventing the door from opening.
For gaps at the bottom of the door:
With the door closed, measure the width of the threshold gap
Cut FloodTape® to length, adding 2 inches on each side
Apply tape along the floor, pressing it firmly against the base of the closed door to create a seal at the junction
Extend the tape slightly up onto the door frame at each side
Important clarification: The tape creates a seal at the threshold junction when the door is closed. For doors that open inward, apply tape to the floor and threshold area. For doors that open outward or that you need to use while sealed (like during a severe weather event), apply tape bridging from the floor onto the door face itself—understanding this temporarily prevents door operation until removed.
For everyday draft protection on frequently-used doors, focus tape application on the door frame sides and top, leaving the threshold for a quality door sweep or weatherstrip that allows normal operation.
Sealing Door Sides and Top
Measure each section of the door frame
Apply tape strips along the frame edges where gaps exist between frame and wall
Press firmly along the entire length, working from center outward
Overlap at corners by at least 2 inches
Sealing Windows
Clean the window frame and surrounding wall surface
Measure and cut tape sections for each side
Apply tape bridging from the frame onto the wall surface, covering any gaps
Overlap corners by at least 2 inches
Press firmly along all edges
Sealing Floor-to-Wall Junctions
This works particularly well in kennel facilities and mudrooms where moisture wicking is a concern:
Sweep and clean the junction thoroughly
Apply tape along the entire length, pressing the bottom half onto the floor and top half onto the wall
For inside corners, cut a small relief notch so the tape lies flat
Overlap sections by at least 2 inches
Sealing Around Pet Door Frames
Pet door frames often leak around their entire perimeter:
Apply tape around the exterior frame where it meets the door or wall
Pay special attention to the bottom rail, which typically has the largest gaps
If the pet door has a removable flap, test that your pet can still push through comfortably after any modifications
Real-World Results
The Drafty Mudroom
A Michigan homeowner converted a back entryway into a dog room. The exterior door had visible daylight around the threshold, and the concrete floor felt ice-cold in winter. Two large breed dogs refused to use their beds, seeking warmer spots elsewhere.
The approach: FloodTape® applied around the door frame perimeter (sides and top), plus along the floor-to-wall junction on the exterior-facing wall. A quality door sweep addressed the threshold for daily use.
The result: Noticeable draft reduction. Within a week, both dogs returned to using the mudroom as their primary resting area. The owner reported the space felt noticeably warmer, and the adjacent laundry room (sharing ductwork) also improved.
The Kennel Facility Moisture Problem
A small Florida boarding facility struggled with moisture along the bottom of exterior walls in their indoor kennel runs. Despite regular cleaning, a musty smell persisted, and staff noticed increased respiratory issues in some boarding dogs.
The approach: FloodTape® applied along all floor-to-wall junctions in the kennel area, plus around the perimeter of two garage-style doors used for outdoor access.
The result: Moisture infiltration stopped within 48 hours. The musty smell disappeared after two cleaning cycles. Staff found maintenance easier since they could remove tape sections for deep cleaning, then reapply fresh tape rather than dealing with deteriorating caulk.
The Veterinary Recovery Suite
A veterinary clinic's basement-level recovery room had temperature fluctuations that complicated post-surgical care. High windows were poorly sealed, and the basement door had a significant threshold gap.
The approach: FloodTape® applied around all window perimeters and along floor junctions on the exterior wall. The threshold was addressed with a combination of tape (on frame sides) and an upgraded door sweep.
The result: Temperature stability improved measurably. The practice manager noted they reduced supplemental heating pad use and saw fewer recovery complications potentially linked to thermal stress.
Your Sealing Checklist
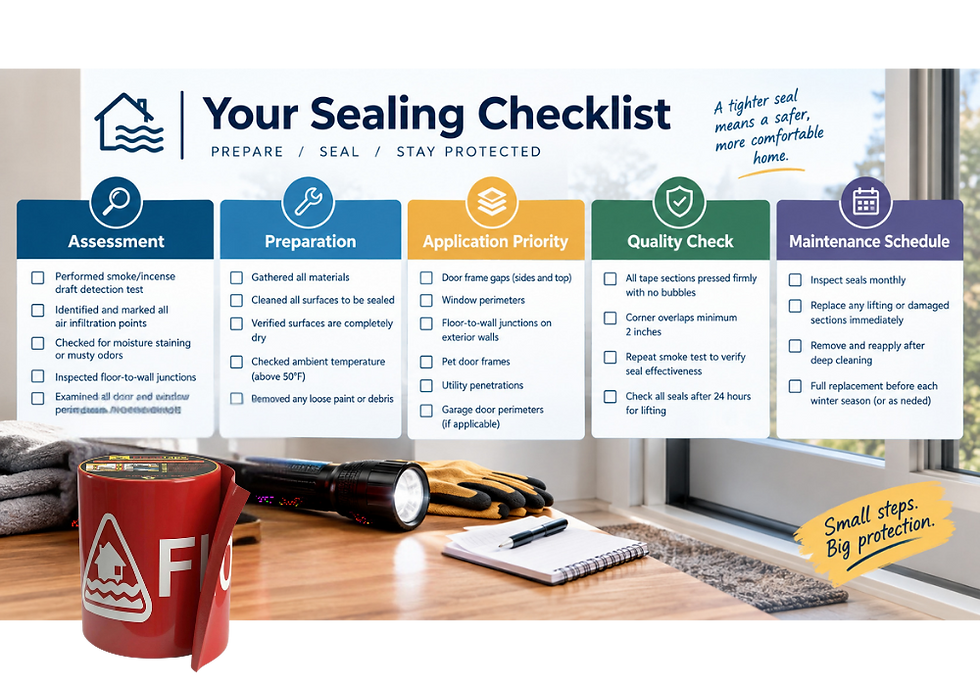
Assessment
[ ] Performed smoke/incense draft detection test
[ ] Identified and marked all air infiltration points
[ ] Checked for moisture staining or musty odors
[ ] Inspected floor-to-wall junctions
[ ] Examined all door and window perimeters
Preparation
[ ] Gathered all materials
[ ] Cleaned all surfaces to be sealed
[ ] Verified surfaces are completely dry
[ ] Checked ambient temperature (above 50°F)
[ ] Removed any loose paint or debris
Application Priority
[ ] Door frame gaps (sides and top)
[ ] Window perimeters
[ ] Floor-to-wall junctions on exterior walls
[ ] Pet door frames
[ ] Utility penetrations
[ ] Garage door perimeters (if applicable)
Quality Check
[ ] All tape sections pressed firmly with no bubbles
[ ] Corner overlaps minimum 2 inches
[ ] Repeat smoke test to verify seal effectiveness
[ ] Check all seals after 24 hours for lifting
Maintenance Schedule
[ ] Inspect seals monthly
[ ] Replace any lifting or damaged sections immediately
[ ] Remove and reapply after deep cleaning
[ ] Full replacement before each winter season (or as needed)
How to Remove FloodTape® Without Damaging Surfaces
When it's time to remove the tape—for cleaning, reconfiguration, or replacement—proper technique protects your surfaces:
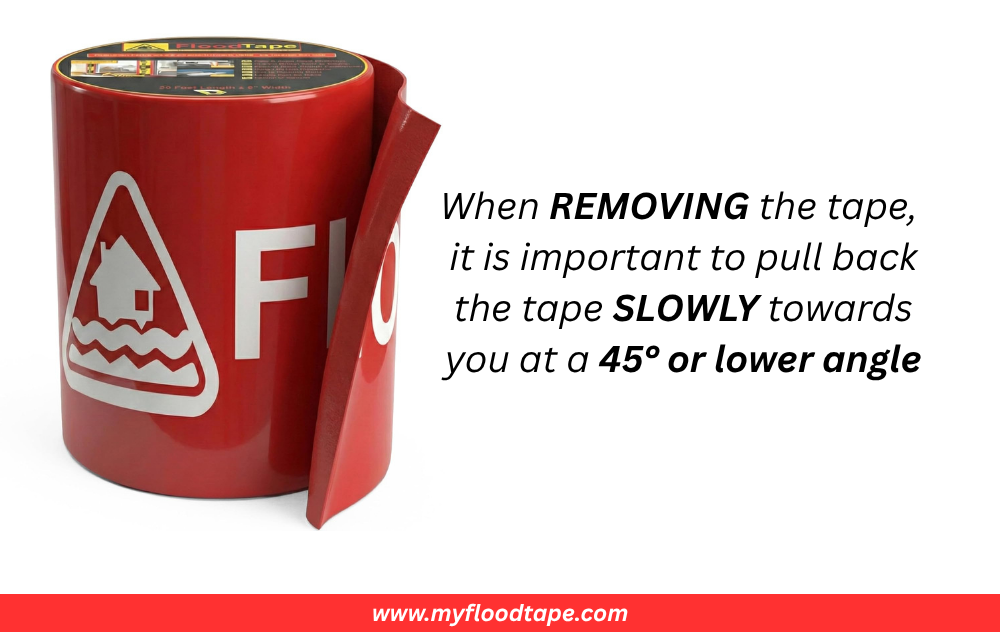
Pull back the tape slowly toward yourself at a 45° angle or lower. This prevents surface damage and allows the adhesive to release cleanly. Rushing or pulling perpendicular to the surface can stress paint and finishes.
For tape that's been in place for an extended period:
Start at one corner and pull slowly
If you feel resistance, gently warm the area with a hair dryer to soften the adhesive
Continue pulling at that low angle
Remove any minor residue with rubbing alcohol
Additional Comfort Measures
Sealing air and moisture infiltration addresses the primary problem. These complementary steps optimize pet comfort:
Elevated bedding: Raising pet beds even a few inches off concrete or tile reduces heat loss through conduction. Cot-style beds or thick foam mats create an air buffer between your pet and the cold floor.
Radiant heat mats: For extremely cold spaces, UL-listed pet heating pads provide safe supplemental warmth. Look for products with chew-resistant cords and automatic temperature regulation.
Humidity monitoring: A simple hygrometer helps track humidity levels. Pet spaces should maintain 30-50% relative humidity for respiratory health.
Proper ventilation: Sealing drafts doesn't mean eliminating all air exchange. Ensure your pet area has adequate fresh air circulation—just controlled, not through random gaps.
What Temperatures Are Safe for Dogs Indoors?
This question comes up frequently. While individual tolerance varies by breed, age, and health status, the American Kennel Club notes that most dogs are comfortable in the same temperature range as humans—between 65-75°F [3].
Senior dogs, puppies, and short-coated breeds are more sensitive to cold. If your pet area regularly drops below 60°F, addressing drafts becomes especially important. Concrete floors can feel significantly colder than air temperature, which is why floor-to-wall sealing and elevated bedding both matter.
Making the Investment
Creating a draft-free, moisture-controlled environment for your pets isn't just about comfort—it's about health, energy efficiency, and peace of mind. For boarding facilities, daycares, and veterinary practices, it's also about client satisfaction and operational costs.
A single 20-foot roll of FloodTape® typically handles 2-3 standard doors or their equivalent in windows and floor junctions. The removable nature means you're never locked into a configuration that doesn't work—you can adjust as your needs change.
Your pets spend significant time in these spaces. They deserve protection from drafts and moisture that matches what you'd expect for your own living areas.
Ready to create a comfortable, draft-free space for your pets? Shop FloodTape® now and experience the difference proper sealing makes.
Frequently Asked Questions
Is FloodTape® safe to use in areas where pets might contact it?
FloodTape® contains no hazardous chemicals and uses materials similar to standard industrial tapes. However, like any adhesive product, apply it where pets cannot chew on it. Focus on door frames, floor-wall junctions, and window perimeters—locations typically out of reach for curious mouths. If your pet shows interest in chewing tape, reposition it higher or behind barriers.
How long will the seal last in a high-traffic pet area?
In most pet area applications, FloodTape® maintains an effective seal for several months to a full season. High-traffic doors may need more frequent inspection and occasional touch-ups. The tape stores well for up to 24 months in cool, dry conditions, so keeping extra on hand for maintenance is practical. Check seals monthly and replace any sections showing wear.
Can I use FloodTape® on chain-link kennel panels?
FloodTape® adheres best to solid surfaces. It can bridge gaps between chain-link frames and walls or floors effectively. For covering chain-link sections themselves to block drafts, combine the tape with a solid backer material like plastic sheeting—the tape seals the edges while the sheeting provides the barrier.
Will the tape damage painted surfaces in my kennel facility?
When removed properly—pulling slowly at a 45° angle or lower—FloodTape® leaves no residue and does not damage paint, varnish, or sealed surfaces. Always test on an inconspicuous area first if you have concerns about specialty finishes or very old paint that may already be compromised.
What's the temperature range for using FloodTape® in pet areas?
FloodTape® performs well across typical building temperature ranges. For optimal adhesion during application, surfaces should be above 50°F (10°C). Once applied, the tape maintains its seal through both heating and cooling cycles common to transitional pet spaces—from summer heat to winter cold.
About FloodTape®
FloodTape® was created by Matthias Herzog, a Florida homeowner who spent 15 years dealing with hurricanes and storm surges along the coast. After trying every flood protection method available—from heavy sandbags to paint-damaging duct tape—he developed a solution that actually worked: an extra-wide, waterproof tape that seals effectively against water intrusion but removes cleanly without residue or surface damage. Today, homeowners and small businesses across the country use FloodTape® not just for flood protection, but for any application requiring a reliable, removable seal against moisture and air infiltration. Each roll is made in the USA and backed by Duke Product Line's commitment to practical innovation.
Cited Works
[1] U.S. Department of Energy — "Air Sealing Your Home." https://www.energy.gov/energysaver/air-sealing-your-home
[2] American Veterinary Medical Association — "Cold Weather Pet Safety." https://www.avma.org/resources-tools/pet-owners/petcare/cold-weather-animal-safety
[3] American Kennel Club — "How Cold Is Too Cold for Dogs?" https://www.akc.org/expert-advice/health/how-cold-is-too-cold-for-dogs/


Comments