
How to Seal Drafty Mudrooms, Entryways, and Laundry Rooms: Stop Cold Air Infiltration for Good

That persistent chill creeping under your mudroom door isn't just uncomfortable—it's quietly draining your wallet every month. If you've walked past your laundry room in winter and felt a blast of cold air, or noticed your entryway feels ten degrees colder than the rest of your house, you're dealing with a common but fixable problem.
Sealing drafty mudrooms, entryways, and laundry rooms is one of the most effective ways to improve your home's energy efficiency and comfort. According to the U.S. Department of Energy, air leaks can account for 25-30% of the energy used for heating and cooling in most homes. Those secondary spaces—the ones we often overlook—are frequently the biggest culprits.
Fortunately, fixing these drafts doesn't require a contractor or expensive permanent renovations. With the right approach and tools, you can dramatically reduce drafts in these problem areas yourself, often in just an afternoon.
Why Mudrooms, Entryways, and Laundry Rooms Are Draft Magnets
These spaces share something in common: they're transition zones. They sit between your home's climate-controlled interior and the outside world, and that positioning creates unique vulnerabilities.
Mudrooms and entryways typically feature exterior doors that see heavy use. Every time that door opens and closes, seals wear down. The weatherstripping compresses. Gaps form along the threshold. Many mudrooms were also added as afterthoughts or built with less insulation than main living areas—a recipe for serious heat loss.
Laundry rooms present their own challenges. Many are located in garages, basements, or against exterior walls. Dryer vents create necessary openings to the outside, but those openings can let cold air back in when the dryer isn't running. Plumbing penetrations for washers add more potential leak points.
These rooms become cold spots that drag down your entire home's comfort and efficiency.

The Real Cost of Ignoring Drafty Secondary Spaces
The Environmental Protection Agency estimates that homeowners can save an average of 15% on heating and cooling costs by air sealing their homes and adding insulation. For a household spending $2,000 annually on energy, that's $300 back in your pocket each year.
But the costs extend beyond your utility bill:
HVAC strain: Your heating system works harder to compensate for cold air infiltration, potentially shortening its lifespan
Uneven temperatures: Drafty secondary spaces create uncomfortable zones that make the whole house feel less pleasant
Moisture issues: Cold air meeting warm interior air can lead to condensation, which promotes mold growth over time
Pest entry: Gaps large enough for air often accommodate insects and small rodents
Those drafts aren't just annoying. They're actively working against your comfort, your wallet, and potentially your home's structural integrity.
Finding the Worst Draft Sources in Your Home
Here's a systematic approach to locating air leaks in your mudroom, entryway, or laundry room.
The Visual Inspection
Start by examining these common trouble spots:
Door frames: Look for visible gaps between the door frame and the wall, especially at corners
Thresholds: Check the gap between the bottom of the door and the floor or threshold
Weatherstripping: Inspect existing weatherstripping for compression, cracking, or missing sections
Window frames: Even small windows in these spaces can have significant gaps
Electrical outlets and switches: Outlets on exterior walls often lack proper insulation behind them
Dryer vents: Check that the exterior vent flap closes completely and the interior connection is sealed
Plumbing penetrations: Pipes entering through walls or floors frequently have unsealed gaps around them
The Hand Test
On a cold day, slowly move your hand around the edges of doors, windows, and other potential leak points. You'll feel cold air flowing in through gaps. This low-tech method is surprisingly effective for finding problem areas.
The Incense or Smoke Test
For more precise detection, light a stick of incense and hold it near suspected leak locations. Watch the smoke—if it wavers, disperses, or gets pulled in a particular direction, you've found an air leak.
The Flashlight Test
At night, have someone stand outside with a flashlight while you're inside with the lights off. If you can see light coming through around doors or windows, air is definitely getting through those same gaps.
Professional Options
For a comprehensive assessment, consider renting or purchasing a thermal leak detector, which uses infrared technology to visualize temperature differences. Alternatively, some utility companies offer professional energy audits that include blower door tests—these pressurize your home to reveal even small leaks you might otherwise miss.

Quick Fixes vs. Permanent Solutions: Making the Right Choice
When it comes to sealing drafts, you have options ranging from quick temporary fixes to permanent renovations. The right choice depends on your situation.
When Temporary Solutions Make Sense
Rental properties where you can't make permanent modifications
Seasonal homes that need protection during specific months
Budget constraints requiring a phased approach to improvements
Testing effectiveness before committing to permanent solutions
Immediate weather events requiring quick action
When Permanent Solutions Are Worth the Investment
Homes you own long-term where you'll recoup the investment
Severe structural issues requiring professional repair
Building code requirements for certain modifications
Integration with larger renovation projects
For many homeowners, the smartest approach combines both: implement temporary solutions for immediate relief while planning permanent fixes for problem areas that warrant the investment.
Sealing Drafty Doors in Mudrooms and Entryways
Doors are typically the biggest source of air infiltration in these spaces. Here's how to tackle them effectively.
Addressing the Door Threshold
The gap between the bottom of your door and the threshold is often the largest opening to the outside. Options for sealing it include:
Door sweeps: These attach to the bottom of the door and brush against the threshold when closed. They're inexpensive and easy to install but wear out relatively quickly with heavy use.
Automatic door bottoms: These retract when the door opens and drop down to seal when it closes. More expensive than basic sweeps but more durable and effective.
Threshold adjustments: Some thresholds can be raised by turning adjustment screws. This closes the gap without adding anything to the door itself.
Sealing Around the Door Frame
The perimeter of the door—where it meets the frame when closed—is another major leak point.
Self-adhesive weatherstripping: Available in foam, rubber, or felt, this applies to the door stop (the part of the frame the door closes against). Foam is cheapest but compresses quickly. Rubber and silicone versions last longer—typically 5-8 years versus 1-3 years for foam.
V-strip weatherstripping: This creates a flexible seal that compresses when the door closes. It's more durable than foam but requires more careful installation.
Door gaskets: For exterior doors, magnetic or compression gaskets provide the tightest seal but often require professional installation for best results.
Using FloodTape® for Quick, Removable Sealing
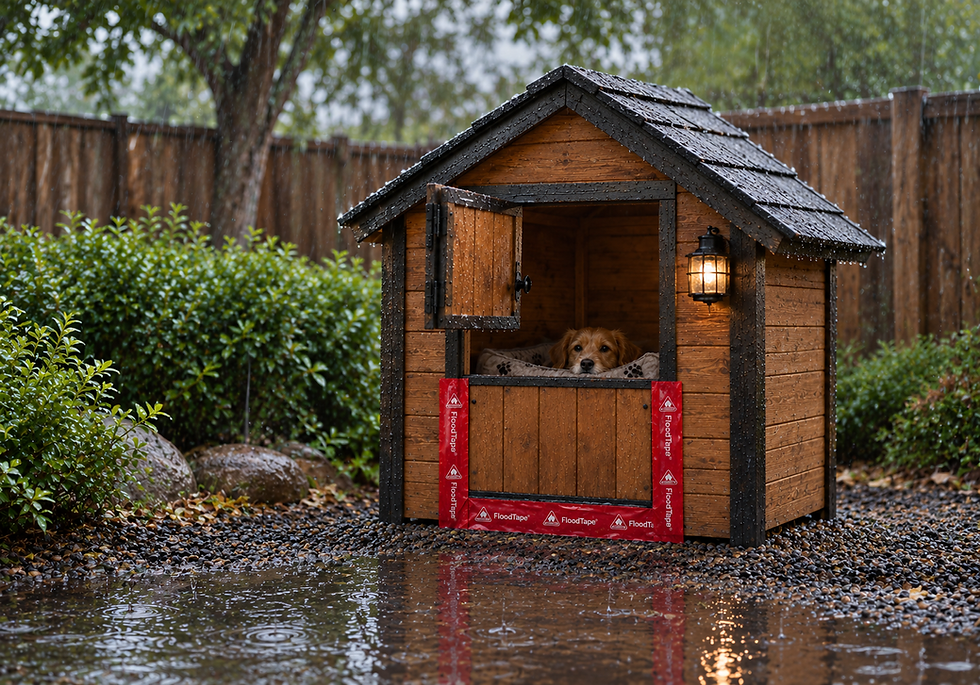
For situations requiring immediate, temporary sealing—or when you want to test whether sealing a particular gap will make a difference—FloodTape® offers a practical solution. Originally designed for flood protection, this 8-inch-wide adhesive tape creates an effective air barrier that peels off cleanly without damaging paint or finishes.

Here's how to use FloodTape® for draft sealing:
Clean the surface thoroughly, removing dust, dirt, and moisture for proper adhesion
Measure the gap you're sealing and cut the tape to length
Apply the tape by pressing firmly along the entire length, ensuring full contact with both surfaces
Smooth out any air bubbles for the best seal
Important removal note: When you're ready to remove it—whether after winter ends, when you're ready for a permanent fix, or if you're moving out of a rental—pull the tape back slowly toward you at a 45° angle or lower. This removal method prevents any surface damage.
This approach works particularly well for:
Sealing the gap between the bottom of a door and an uneven threshold
Covering gaps in door frames where traditional weatherstripping won't stick
Creating a temporary seal while waiting for replacement doors or permanent repairs
Protecting against both drafts and potential water intrusion in mudrooms
One practical note: adhesive products work best on dry surfaces at moderate temperatures. If you're trying to seal a freezing threshold during a cold snap, warm the surface first with a hair dryer—otherwise, the adhesive won't bond properly.

Tackling Draft Issues in Laundry Rooms
Laundry rooms present unique sealing challenges because of their specific fixtures and typical locations.
Sealing the Dryer Vent
Your dryer vent is a necessary opening to the outside, but it shouldn't let cold air back in. Check these points:
The exterior vent flap: It should close completely when the dryer isn't running. If it's stuck open, damaged, or missing, replace the entire vent cap.
The interior vent connection: Where the flexible duct connects to both the dryer and the wall, use foil tape (not standard duct tape, which degrades over time) to seal any gaps.
The wall penetration: The hole cut for the vent should be sealed around the edges where the vent pipe passes through. Exterior-grade silicone caulk handles this job well—it stays flexible through temperature changes and resists moisture.
Addressing Plumbing Penetrations
Where water supply lines and drain pipes enter the laundry room, gaps often exist around the openings. For pipes against exterior walls, these gaps become direct pathways for cold air.
Low-expansion foam: For larger gaps (over an inch), use foam specifically labeled "low-expansion" or "window and door foam." Standard expanding foam can warp frames and damage pipes—it expands with surprising force.
Caulk: For smaller gaps under an inch, acrylic latex caulk provides a clean, paintable seal for interior applications. For moisture-prone areas or exterior walls, 100% silicone caulk offers better durability.
Escutcheons and trim rings: Decorative covers can hide sealed gaps while providing additional air blocking.
Insulating Exterior Walls
If your laundry room is against an exterior wall or in a garage, consider whether the walls themselves are adequately insulated. Signs of poor insulation include:
Walls that feel cold to the touch in winter
Significant temperature difference between the laundry room and adjacent interior spaces
Visible condensation on walls during cold weather
Adding insulation is a larger project, but for unfinished spaces like garage laundry areas, it's often straightforward. Faced fiberglass batts installed between studs provide immediate improvement.
Room-by-Room Sealing Checklist
Use this checklist to systematically address drafts in your secondary spaces.
Mudroom and Entryway Checklist
[ ] Inspect and replace worn door weatherstripping
[ ] Check threshold seal and adjust or add door sweep
[ ] Seal gaps around door frame with caulk or foam
[ ] Insulate electrical outlets on exterior walls
[ ] Check for gaps around any windows
[ ] Inspect where the floor meets exterior walls
[ ] Verify any pet doors seal properly when not in use
[ ] Check ceiling for gaps if there's an unheated space above
Laundry Room Checklist
[ ] Ensure dryer vent flap closes completely
[ ] Seal dryer vent connections with foil tape
[ ] Caulk around dryer vent wall penetration
[ ] Seal gaps around water supply lines
[ ] Seal gaps around drain pipes
[ ] Check for drafts around any windows
[ ] Insulate hot water pipes (saves energy and reduces condensation)
[ ] Address any gaps where exhaust vents exit the room

Before and After: What Proper Sealing Achieves
These scenarios illustrate the impact of comprehensive draft sealing.
Scenario 1: The Drafty Mudroom
Before: A 1990s colonial with an attached mudroom. The exterior door's weatherstripping had compressed to almost nothing. A half-inch gap existed along the threshold. The homeowner reported the mudroom was "unusable" in winter—coats stored there felt cold and damp.
After sealing: New weatherstripping installed around the door perimeter. An automatic door bottom added. For the uneven floor that created persistent gaps along the threshold, a temporary seal was applied until the threshold could be professionally replaced. The homeowner reported an immediate temperature increase of approximately 8°F in the mudroom and noticeably warmer conditions in the adjacent kitchen.
Scenario 2: The Garage Laundry Room
Before: A laundry area in an attached garage with minimal insulation. The dryer vent flap was stuck partially open. Multiple gaps existed around plumbing penetrations. Cold air poured in during winter, making laundry tasks uncomfortable and causing pipes to freeze during extreme cold snaps.
After sealing: New dryer vent cap installed with proper flap closure. All plumbing penetrations sealed with low-expansion foam and silicone caulk. The door between garage and laundry area weatherstripped. Faced insulation added to exterior walls. Temperature in the space increased significantly, pipe freezing risk was eliminated, and the homeowner reported the space was finally comfortable for extended use.
Scenario 3: The Historic Home Entryway
Before: A 1920s craftsman with original doors featuring beautiful hardware but terrible efficiency. Visible daylight showed around the door edges. The owner wanted to preserve the historic character while improving comfort.
After sealing: Rather than replacing the door, compression weatherstripping was carefully installed to minimize visual impact. A custom threshold was added to match the home's character. For the bottom gap where the historic door couldn't be modified, FloodTape® provided a removable seal during the coldest months that peeled away without affecting the door's finish when spring arrived. Energy costs dropped noticeably while the home retained its historic integrity.
The Energy Savings You Can Expect
While individual results vary based on climate, home size, and severity of existing air leaks, properly sealing drafty secondary spaces typically delivers meaningful savings.
The U.S. Department of Energy notes that reducing drafts in a home can lower energy costs by 10-20% in many cases. For mudrooms, entryways, and laundry rooms specifically, you might expect:
Immediate comfort improvement: These spaces become usable year-round instead of avoided during extreme weather
Reduced strain on HVAC: Your system runs shorter cycles, extending equipment life
Lower utility bills: Most homeowners see returns on sealing investments within one to two heating seasons
Decreased moisture issues: Better sealing means less condensation and associated problems
The key is addressing these spaces systematically rather than piecemeal. A single sealed gap helps, but comprehensive sealing of an entire room delivers dramatically better results.
Maintaining Your Seals Over Time
Sealing isn't a one-and-done project. Even the best weatherstripping and caulk degrade over time.
Annual inspection: At the start of each heating season, check your seals using the methods described earlier. Look for compressed weatherstripping, cracked caulk, and gaps that have reopened.
Replace worn materials promptly: A worn door sweep or compressed weatherstripping still blocks some air, but effectiveness drops significantly. Don't wait until seals fail completely.
Address new gaps quickly: Settling, temperature changes, and normal use can create new gaps. Catching and sealing them early prevents larger problems.
Consider seasonal adjustments: For temporary sealing solutions like FloodTape®, apply at the start of the challenging season and remove when no longer needed. This keeps surfaces fresh and ensures adhesive works properly each time.
Your Next Step Toward a Draft-Free Home
Start with the room causing the most discomfort or showing the most obvious air infiltration. Often, a single afternoon of work on one mudroom or entryway delivers noticeable results that motivate tackling the rest.
For immediate, removable sealing that won't damage your surfaces, FloodTape® offers a practical option. Its 8-inch width covers gaps that narrower tapes miss, and its clean-peel removal means you're never committed to a permanent change until you're ready.
Ready to stop those drafts? Grab your checklist, identify your worst offenders, and get started. Your warmer, more efficient home is just a few seals away.
Frequently Asked Questions
What's the fastest way to seal a drafty door temporarily?
Clean the door frame and threshold area thoroughly, then apply a wide adhesive tape like FloodTape® along the gaps. This creates an effective air barrier in minutes and can be removed later without damaging paint or finishes. For clean removal, pull back slowly at a 45° angle or lower.
Can I seal drafts in my rental without losing my security deposit?
Removable solutions work well for renters: draft stoppers that sit against door bottoms, removable window film kits, and temporary adhesive weatherstripping designed for renters. Products like FloodTape® peel off cleanly, leaving surfaces undamaged when you move out.
How do I know if my drafts are severe enough to warrant professional help?
If you can see daylight around closed doors or windows, feel strong airflow even after basic sealing attempts, or notice frost or condensation forming on interior surfaces, consider consulting a professional. Major structural gaps, damaged framing, or inadequate wall insulation typically require more than DIY solutions.
Will sealing my mudroom make moisture problems worse?
Proper sealing shouldn't increase moisture issues—it often helps by preventing cold air from meeting warm humid air and creating condensation. However, very tight sealing without adequate ventilation can trap moisture. Ensure any sealed space still has appropriate ventilation, especially in laundry rooms where humidity is generated.
How long do most weatherstripping and sealing materials last?
Foam weatherstripping typically lasts 1-3 years with normal use. Rubber and silicone versions can last 5-8 years. Acrylic latex caulk generally remains effective for 5-10 years depending on quality and location; 100% silicone caulk can last even longer in moisture-prone areas. Inspect seals annually and replace as needed rather than waiting for complete failure.
About This Guide
This guide draws on established building science principles and energy efficiency best practices from sources including the U.S. Department of Energy and Environmental Protection Agency. FloodTape® is recommended as one effective solution among many for temporary, removable sealing applications where homeowners need quick results without permanent modifications.
Works Cited
[1] U.S. Department of Energy — "Air Sealing Your Home." https://www.energy.gov/energysaver/air-sealing-your-home
[2] U.S. Environmental Protection Agency — "Why Seal and Insulate?" https://www.energystar.gov/campaign/seal_insulate/why_seal_and_insulate
[3] U.S. Department of Energy — "Energy Saver Guide: Tips on Saving Money and Energy at Home." https://www.energy.gov/energysaver/energy-saver-guide-tips-saving-money-and-energy-home


Comments