Apartment Flood Risk: How Renters in Basement and Garden-Level Units Can Protect Their Space
- Matthias Herzog

- May 18
- 9 min read
That garden-level apartment seemed perfect when you signed the lease—private entrance, cozy atmosphere, rent that actually fit your budget. What the listing failed to mention? Your front door sits three feet below street level. When heavy rain arrives, water has exactly one place to go.
Renters in basement units and garden-level spaces face increased flood exposure, and most flood protection advice assumes you own the property. Install a sump pump. Regrade the landscaping. Seal the foundation. Useful guidance—if you're not bound by a lease agreement.
If you've watched water creep under your door during a storm and felt powerless to stop it, you're dealing with a problem that affects thousands of renters every year. The gap between what you need and what you're allowed to do as a tenant can feel impossible to bridge.
This guide breaks down why below-grade apartments flood, which entry points you can actually address, and how a temporary DIY solution can keep your belongings dry without violating your lease or damaging the property.
Why Basement and Garden-Level Apartments Flood More Frequently
Urban stormwater systems weren't designed for the rainfall patterns many cities experience today. The Federal Emergency Management Agency (FEMA) identifies flooding as the most common and costly natural disaster in the United States [1]. What's shifted is where that water accumulates. When streets flood, runoff seeks the lowest available point—and below-grade apartments become collection basins.
How Water Enters Below-Grade Units
Several physical factors work against garden-level and basement apartments:
Street runoff moves downward. A few inches of standing water on the sidewalk can become a stream heading directly toward your stairwell.
Window wells collect rainwater. Those below-grade windows designed to let in natural light also act as reservoirs during heavy storms—sometimes filling faster than they can drain.
Door thresholds have gaps. Standard doors weren't engineered to be watertight. Water follows the path of least resistance, typically the quarter-inch space at the bottom of your door.
Saturated soil creates pressure. When the ground around a basement becomes waterlogged, water pushes against foundation walls and seeps through any available crack.
According to the National Flood Insurance Program, just one inch of floodwater in a home can cause more than $25,000 in damage [2]. For renters, that translates to ruined furniture, destroyed electronics, and potentially losing your security deposit over water stains you didn't cause.

The Renter's Challenge: Protection Without Permanent Modifications
Most flood mitigation guidance targets property owners who can make structural changes. Renters face a different reality: you need flood protection that works, but you can't install permanent modifications. You also can't stack fifty-pound sandbags by your door every time rain enters the forecast.
Entry Points You Can Address vs. Landlord Responsibilities
Before exploring solutions, it helps to identify which flood entry points fall within your control:
Entry Point | Common in Basement Units? | Renter-Addressable? |
Exterior door threshold | Yes | Yes |
Window wells/frames | Yes | Often |
Sliding patio doors | Sometimes | Yes |
HVAC vents near ground | Sometimes | Limited |
Floor drains (backup) | Yes | No (landlord issue) |
Doors and windows are within your territory. Floor drains backing up or foundation cracks require a conversation with your landlord—and potentially their insurance company.
How FloodTape® Addresses the Renter's Flood Protection Gap
FloodTape® is an 8-inch wide, 20-foot long waterproof adhesive tape designed to seal doors, windows, and other entry points against floodwater. You apply it when a storm approaches, it creates a watertight barrier, and—critically for renters—it peels off cleanly without leaving residue or damaging paint.
No drilling. No permanent installation. No explaining modifications to your landlord during move-out.
Why This Works for Below-Grade Living
Traditional flood barriers assume you have outdoor space—a yard for sandbags, a driveway for inflatable dams. Garden-level apartments typically have none of that. What you do have is a door frame and possibly a few windows.
FloodTape® fits this scenario because:
It covers the gaps that matter most. The quarter-inch space under your door? The tape's 8-inch width provides complete coverage across the threshold and up the frame.
It adheres to common building materials. Wood, metal, glass, vinyl, and stucco—the surfaces actually found in apartment entryways.
It removes without causing damage. Apply it before the storm, remove it after. One user reported leaving it in place for 24 hours during a flood event and removing it without any damage to an antique wood door.

Step-by-Step: Protecting Your Apartment Before the Storm
When the forecast shows heavy rain and flood warnings start appearing, follow this preparation sequence.
Phase 1: Identify Your Entry Points (10 Minutes)
Walk through your unit and locate every place water could enter at ground level or below:
Main entry door
Secondary or emergency exit doors
Ground-level or below-grade windows
Sliding glass doors
Pet doors
Check for visible gaps at thresholds and frames. If daylight is visible, water can get through.
Phase 2: Prepare the Surfaces (5-10 Minutes)
FloodTape® bonds most effectively to clean, dry surfaces. Before rain begins:
Wipe down door frames and thresholds with a dry cloth to remove dust and debris.
If surfaces are already damp, dry them as thoroughly as possible.
Clear doormats, planters, or other obstacles from the entry area.
Timing matters: The adhesive won't bond properly to wet surfaces. Apply before the storm arrives, not once water has started pooling.
Phase 3: Apply FloodTape® (15-20 Minutes)
Follow this application process:
Measure and cut. For a standard 36-inch door, plan for approximately 3-4 feet for the threshold and another 6-7 feet if sealing the sides.
Start at the threshold. Position tape horizontally across the bottom of the closed door, pressing firmly to create a continuous seal. Overlap onto the floor by at least 2-3 inches.
Seal the sides. Run tape vertically along each side of the door frame, overlapping with the threshold piece. Press firmly along the entire length.
Reinforce corners. Corners are where leaks develop. Ensure tape overlaps at every junction.
Address window wells. For below-grade windows, apply tape around frame edges where water might seep in.
What to expect: When properly applied to a standard residential door, FloodTape® can help prevent water from seeping through threshold gaps and frame edges during typical storm flooding. One customer in Arizona used it on a rental property before an anticipated storm and reported it successfully kept water from entering through the sealed door. Results depend on specific conditions, water depth, door construction, and proper application.
Phase 4: After the Storm
Once water has receded:
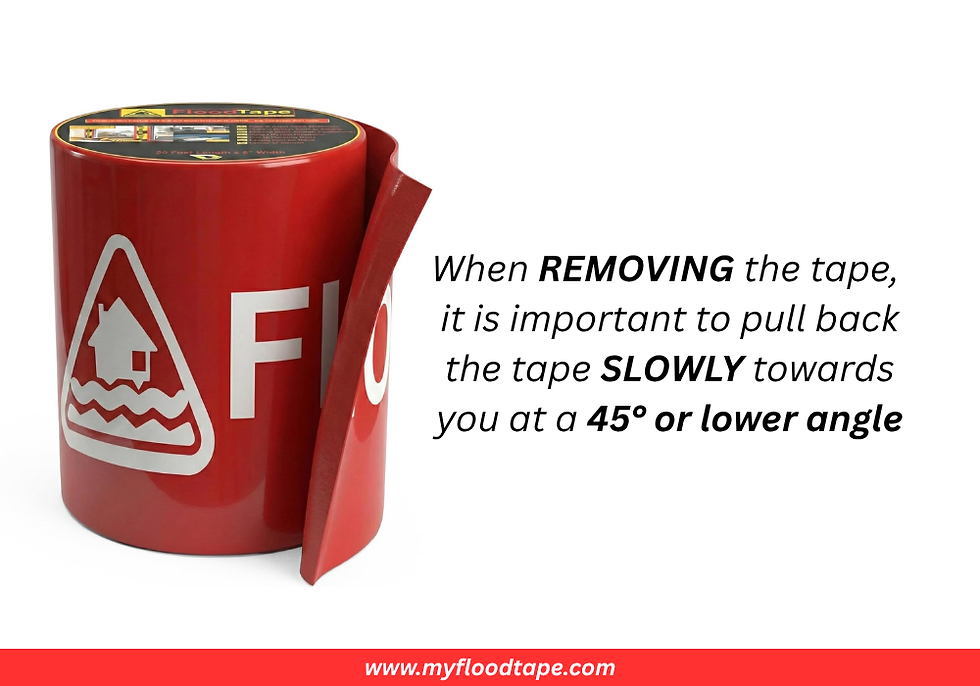
Starting at one corner, slowly peel the tape away from the surface at a low angle.
Work gradually—pulling too quickly can stress the surface.
Dispose of used tape (it's designed for single use).
Inspect your door frame for any issues.
That final step matters for renters. Clean, undamaged surfaces mean no difficult conversations during your move-out inspection.
Two Scenarios: Prepared vs. Unprepared
Here's how this preparation plays out in the real world.
Scenario A: Without Preparation
A renter in a garden-level Houston apartment faced repeated flooding during heavy rain. Water would pool in the stairwell leading to her front door. She tried wedging towels under the door—they saturated within minutes. Her landlord's response: water "just happens" in basement units.
During one major storm, several inches of water accumulated in her stairwell. The towel barrier failed within an hour. Water seeped across her entryway, soaking the carpet and reaching her couch. The damage included a ruined area rug, water-stained carpet with security deposit implications, and two days of cleanup with fans and dehumidifiers.
Her renter's insurance covered the rug minus the deductible. The carpet damage resulted in a $400 deduction from her security deposit when she moved out.
Scenario B: With Preparation
A renter in a similar Florida below-grade apartment—external stairwell, door at the bottom, water collecting during heavy rain—took a different approach after one close call. He purchased FloodTape® and stored it in his coat closet.
When a hurricane warning arrived, he applied the tape to his door threshold and frame the evening before the storm made landfall. His stairwell accumulated several inches of standing water during the storm. The tape held, and the sealed entry points stayed dry. When he checked his door after the storm passed, the interior remained completely dry.
He peeled off the tape, disposed of it, and continued with his day. No damage, no insurance claim, no deposit deduction.
The cost difference between these outcomes is substantial. One roll of tape versus hundreds in repairs and lost deposit.

Renter's Flood Preparedness Checklist
Keep this reference accessible for when it matters.
Before Storm Season:
[ ] Identify all below-grade entry points in your unit
[ ] Purchase FloodTape® (one roll covers a standard door; consider two rolls for multiple entry points or windows)
[ ] Store tape in an accessible location (not behind the door you'll need to seal)
[ ] Review your renter's insurance policy for flood coverage
[ ] Document your belongings with photos for insurance purposes
Insurance Note: Standard renter's insurance policies typically exclude flood damage caused by weather events like storms or rising water. This type of coverage usually requires a separate flood insurance policy, often through the National Flood Insurance Program (NFIP), which offers contents-only policies for renters. Check your policy language carefully—coverage for burst pipes differs from coverage for storm flooding.
When a Storm Warning Arrives:
[ ] Clean and dry all door frames and thresholds
[ ] Apply FloodTape® to exterior doors before rain begins
[ ] Seal any below-grade window frames showing gaps
[ ] Move valuable items away from doors and windows
[ ] Elevate electronics and important documents off the floor
After the Storm:
[ ] Wait until water has receded before removing tape
[ ] Peel tape slowly at a low angle
[ ] Inspect surfaces for any issues
[ ] Document any water intrusion with photos
[ ] Contact landlord immediately if water entered through building defects
When Prevention Isn't Enough: Talking to Your Landlord
FloodTape® provides temporary flood protection at entry points you can control. It doesn't address fundamental building issues.
If you're experiencing:
Water coming up through floor drains
Seepage through foundation walls
Window wells that don't drain properly
Persistent flooding regardless of entry point sealing
These are landlord responsibilities. Document everything—photos, dates, written communications—and submit repair requests in writing. Many jurisdictions require landlords to maintain habitable conditions, and chronic flooding may qualify as a habitability issue.
FloodTape® gives you protection while you advocate for proper building maintenance. It supplements—but doesn't replace—structural repairs that only the property owner can authorize.
Protect Your Space Before the Next Storm
Living below grade doesn't mean accepting water damage as inevitable. With the right preparation, you can keep your apartment dry, your belongings safe, and your security deposit intact.
FloodTape® offers renters something they rarely have in flood situations: control. It's easy to install, leaves no residue, and provides effective protection when water shows up at your door.
Ready to protect your apartment? Get FloodTape® now and have it on hand before the next storm.
Frequently Asked Questions
Will FloodTape® damage my apartment's door frame or paint?
FloodTape® is designed to remove cleanly without leaving residue or damaging paint, varnish, or finishes. Users have confirmed it peels off without harming surfaces, including antique wood doors. This makes it appropriate for renters who need to return their unit in original condition. The adhesive bonds effectively against water but releases cleanly from properly prepared surfaces.
How much FloodTape® do I need for a standard apartment door?
One 20-foot roll typically covers one to two standard entry doors, depending on how thoroughly you seal the frame. For a single door with threshold and side sealing, plan for approximately 10-12 feet. If you have multiple entry points, below-grade windows, or want backup supply, the 6-pack provides comprehensive coverage for larger protection needs.
Can I apply FloodTape® after water has already started pooling?
For best results, apply FloodTape® to clean, dry surfaces before the storm arrives. The adhesive creates a stronger bond on dry surfaces. If water has already begun accumulating, dry the surface as thoroughly as possible before application—though this may reduce effectiveness compared to advance preparation.
Does standard renter's insurance cover flood damage from storms?
Standard renter's insurance policies typically exclude flood damage caused by rising water, storm surge, or surface water from heavy rain. This coverage requires separate flood insurance, available through the National Flood Insurance Program (NFIP) as a contents-only policy for renters. Check your policy language carefully and consider adding flood coverage if you live in a flood-prone area. Prevention with tools like FloodTape® remains valuable regardless of insurance status.
How long can FloodTape® remain in place during a storm?
FloodTape® can stay in place for the duration of a typical storm event. Users have reported it performing well during 24-hour flood events without issue. For extended periods beyond normal storm duration, the manufacturer recommends following included instructions and removing the tape once flood risk has passed. The tape is designed for temporary deployment, not permanent installation.
About This Guide
This article was created by FloodTape®, a DIY flood protection company founded by Matthias Herzog. After 15 years of living in hurricane-prone St. Augustine, Florida, and experiencing countless storms while trying every flood protection method available—sandbags (heavy, messy), duct tape (left sticky residue, ruined paint), silicone caulk (worked but impossible to fully remove)—Matthias invented FloodTape® to provide an effective, easy-to-use, and damage-free solution for homeowners and renters alike. FloodTape® is patent-pending and designed based on real-world flood protection experience.
Works Cited
[1] Federal Emergency Management Agency (FEMA) — "Flood." https://www.fema.gov/flood
[2] FloodSmart.gov (National Flood Insurance Program) — "The Cost of Flooding." https://www.floodsmart.gov/flood-insurance-cost/cost-of-flooding


Comments