The TikTok Effect: Viral Flood Footage and What It Teaches About Home Weak Spots
- Matthias Herzog

- May 3
- 11 min read
You've seen them scrolling through your feed. A homeowner filming murky brown water seeping under their front door. A garage filling up in minutes while someone desperately throws towels at the gap beneath the door. A basement window giving way as floodwater pours through like someone turned on a fire hose.
These viral flood videos rack up millions of views, and for good reason. They're terrifying, mesmerizing, and—if you're paying attention—incredibly educational.
Every single one of those nightmare clips is teaching you exactly where your home is most vulnerable. The question is whether you're watching and learning, or just scrolling past.
Why Viral Flood Videos Are Dominating Social Media Right Now
Social media has fundamentally changed how we witness disasters. Before TikTok and Instagram Reels, you might read about flooding in another state and move on. Now you're watching it happen in real-time from someone's living room.
The numbers back this up. According to the Federal Emergency Management Agency (FEMA), flooding remains the most common and costly natural disaster in the United States, causing billions in damage annually [1]. Climate patterns are making these events more frequent and intense in regions that previously considered themselves "safe."
What's different now is the documentation. Homeowners aren't just experiencing floods—they're filming every second of them. And those videos create a massive, crowdsourced database of exactly how water infiltrates homes.
The algorithm doesn't care about your zip code. Whether you're in coastal Florida, landlocked Missouri, or the Pacific Northwest, your feed is showing you floods. And that visibility is prompting a long-overdue question: What would I do if that were my house?

The Five Entry Points That Go Viral Every Storm Season
After watching hundreds of these videos (research, I promise), patterns emerge. Water doesn't attack homes randomly. It exploits the same weak spots over and over again.
The Door Gap Disaster
This is the money shot of flood content. Water rushing under a front door or sliding glass door while someone frantically stuffs towels into the gap. The towels immediately become saturated and useless. The water keeps coming.
Door thresholds are designed for foot traffic, not water pressure. Even a well-installed door has a gap at the bottom—it has to, or you couldn't open it. That gap becomes a highway for floodwater.
What makes these videos so compelling is the speed. One moment there's a trickle. Ninety seconds later, there's two inches of standing water spreading across hardwood floors.
The Garage Door Flood
Garage doors might be the most overlooked vulnerability in residential flood protection. They're massive, they have seals that degrade over time, and most people never think about them until water is pouring through.
The viral clips here are particularly dramatic because garages often contain the most expensive equipment besides the house itself—cars, tools, storage, sometimes home offices or gyms. Watching someone's entire workshop flood in minutes hits different than an empty room filling up.
Water pressure against a garage door pushes against seals that were never designed for hydrostatic force. The typical garage door seal sits loosely against concrete that may have settled or cracked over the years. Add any amount of water pressure, and that seal means nothing.
The Window Seep
Basement and ground-floor windows rarely get the attention they deserve until they fail. The videos of window well flooding show water pooling against glass, finding tiny gaps in caulking or weatherstripping, and turning a trickle into a stream.
What's particularly sneaky about window infiltration is that it often starts small. A little moisture around the frame. Some dampness on the sill. By the time it becomes a visible flow, significant water damage has already occurred behind walls and beneath flooring.
Crawlspace Vents and Weep Holes
These lesser-known entry points don't generate as many viral videos, but they appear regularly in post-flood damage assessments. Crawlspace vents sit low on foundation walls, and weep holes—those small gaps at the base of brick exteriors designed to let moisture escape—can quickly become entry points when water rises.
Many homeowners don't even know these openings exist until they're dealing with the aftermath.
Foundation Cracks and Floor Drains
The most insidious flood videos show water seemingly appearing from nowhere—bubbling up through floor drains or seeping through hairline foundation cracks. These entry points are harder to address quickly, but recognizing them as vulnerabilities is the first step toward a comprehensive protection plan.

What These Videos Actually Teach (Beyond Fear)
Every video is a case study in failure points. And failure points can be addressed before the water arrives.
Pattern 1: Water follows gravity and pressure. It will always find the lowest point and exploit any gap. This isn't mysterious—it's physics. Doors at ground level or below, windows near grade, and any opening that isn't perfectly sealed becomes a target.
Pattern 2: Traditional responses don't scale. Towels, sandbags grabbed at the last minute, duct tape slapped on in a panic—these approaches appear in video after video, and they fail in video after video. The effort-to-effectiveness ratio is brutal. One homeowner in a viral clip spent twenty minutes hauling sandbags only to watch water flow around them.
Pattern 3: Speed matters enormously. The videos where homeowners successfully minimize damage share a common element: they acted quickly with a plan and materials already in place. The videos where everything floods share a different common element: improvisation under pressure.
Pattern 4: Removal and aftermath create secondary problems. Some of the most frustrating clips aren't the flooding itself—they're the aftermath. Duct tape that ripped paint off antique door frames. Sandbag residue tracked through the entire house. Caulk that worked during the flood but now won't come off without damaging the surface beneath it.
Pattern 5: Smaller floods cause surprising damage. You don't need a catastrophic storm surge to lose thousands of dollars. Many viral videos show just a few inches of water destroying flooring, warping cabinets, and creating conditions for mold growth.
How to Seal Your Home's Most Vulnerable Entry Points
Watching viral flood footage is one thing. Doing something about it is another. The answer involves three components: assessment, preparation, and the right materials for temporary sealing that won't create new problems.
Assessment: Walk Your Property Like a Flood Scout
Spend thirty minutes walking around your home with fresh eyes. Pretend water is rising from the ground and ask yourself:
Where would water first make contact with the structure?
Which doors sit lowest relative to ground level?
Are there gaps visible beneath doors when closed?
What's the condition of garage door seals?
Do ground-floor or basement windows have functioning weatherstripping?
Are there any cracks in foundation walls or floors?
Where are crawlspace vents and weep holes located?
Do floor drains have functioning check valves?
This isn't complicated. You're looking for the same vulnerabilities that show up in viral videos. Most homes have two or three obvious weak points that would benefit from attention.
Preparation: Materials On Hand Before You Need Them
The homeowners who fare best in flood situations aren't necessarily more skilled—they're more prepared. They have materials staged and a basic plan in mind before warnings hit their phone.
For entry point protection, you need something that:
Creates a watertight seal against various surfaces
Applies quickly without tools or special training
Removes cleanly without damaging paint, wood, or other finishes
Stores easily for months or years until needed
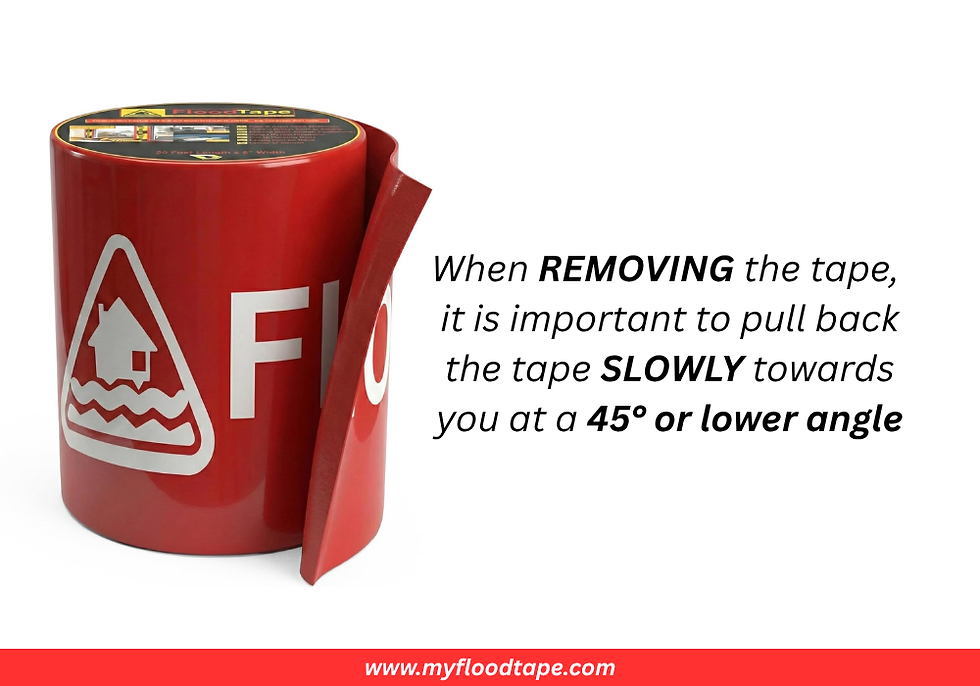
FloodTape® was designed specifically for this scenario. It's an 8-inch wide, 20-foot long adhesive tape that seals doors, windows, garage gaps, and other entry points against water intrusion. The application takes minutes—clean the surface, cut to length, press firmly. When the threat passes, pull it back slowly toward you at a 45-degree angle or lower, and it removes without leaving residue or damaging surfaces beneath [2].
This matters because temporary flood protection that creates permanent surface damage isn't really a solution. It's trading one problem for another.
Application: Sealing Your Home's Weak Spots Step by Step
For Exterior Doors:
Clean the door frame and threshold with a dry cloth to remove dust and moisture
Measure and cut FloodTape® to cover the bottom of the door, extending several inches up each side of the frame
Apply firmly to create continuous coverage with no gaps
For added protection, run a second strip overlapping the first, covering the door-to-frame junction on the hinge side
For Garage Doors:
Focus on the bottom seal area and the sides where the door meets the frame
Apply tape to create a continuous barrier across the bottom, pressing firmly into the concrete surface
Address side gaps by running tape vertically where the door edge meets the frame
For segmented garage doors, consider the horizontal joints between panels as secondary concern areas
For Ground-Level and Basement Windows:
Clean the window frame and surrounding wall surface
Apply tape around the entire perimeter of the window, overlapping at corners
Press firmly to ensure adhesion to both glass and frame materials
For window wells that may pool water, ensure tape extends below the visible window line
For Crawlspace Vents and Weep Holes:
These smaller openings can be sealed with shorter tape sections
Ensure complete coverage of the opening with tape extending onto surrounding surfaces
Check that adhesion is strong on whatever material surrounds the vent (brick, concrete, siding)
Before and After: What Smart Preparation Actually Looks Like
Scenario 1: The Flash Flood Warning
Without preparation: Phone buzzes with an alert. Homeowner runs to garage, finds no sandbags. Tries hardware store—sold out. Returns home to find water already seeping under the front door. Grabs beach towels. Towels saturate within minutes. Water spreads across living room hardwood. Final damage: buckled flooring, baseboard replacement, three weeks of repairs.
With preparation: Phone buzzes with an alert. Homeowner retrieves FloodTape® from garage shelf. Applies to front door threshold and frame in under ten minutes. Monitors situation. Water rises outside, reaches door, cannot enter. After flood recedes, removes tape by pulling back slowly at 45-degree angle. No water damage. No surface damage. No residue.
Scenario 2: The Hurricane Approach
Without preparation: Storm tracking toward coastal home. Homeowner applies duct tape to garage door seams and window frames. Tapes plastic sheeting over basement window. Storm passes with moderate flooding. Duct tape peels off with chunks of paint from the garage door. Plastic sheeting leaked at multiple points. Basement window frame finish is ruined. Flood damage plus cosmetic damage to repair.
With preparation: Storm tracking toward coastal home. Homeowner applies FloodTape® to garage door bottom and sides, exterior door thresholds, and basement window perimeters. Storm passes with moderate flooding. Tape holds throughout, no water infiltration at sealed points. After storm, removes all tape with no residue left behind, no paint damage, no refinishing needed.
Scenario 3: The Rental Property
Without preparation: Property manager receives panicked call from tenant about rising water. Drives across town. Water already inside by arrival. Tenant tried caulk around basement window—worked during flood but now permanent and ugly. Insurance claim filed. Tenant upset. Property damaged. Caulk removal requires window frame refinishing.
With preparation: Property manager previously provided tenants with FloodTape® and simple instructions. Tenant applies at first sign of water threat. Water kept out. After event, tape removed without damaging surfaces. No insurance claim. No tenant drama. No repairs needed.
Your Pre-Flood Checklist
Print this. Put it somewhere you'll find it when you need it.
Assessment (Do This Weekend)
[ ] Walk property perimeter noting all ground-level entry points
[ ] Inspect door thresholds for visible gaps
[ ] Check garage door seal condition
[ ] Examine ground-floor and basement window seals
[ ] Note any foundation cracks or gaps
[ ] Locate crawlspace vents and weep holes
[ ] Check floor drain functionality
[ ] Photograph current conditions for reference
Preparation (Do Before Storm Season)
[ ] Purchase FloodTape® (one roll covers approximately one standard door or two windows)
[ ] Store in accessible location with other emergency supplies
[ ] Download installation instructions
[ ] Brief household members on location and basic application
[ ] Identify which entry points are highest priority for your specific home
When Warnings Hit
[ ] Retrieve materials from storage
[ ] Clean target surfaces (dry cloth, remove dust and debris)
[ ] Apply tape to priority entry points starting with lowest/most vulnerable
[ ] Overlap strips for continuous coverage
[ ] Press firmly to ensure strong adhesion
[ ] Monitor sealed areas during event
After the Threat Passes
[ ] Remove tape by pulling back slowly toward you at 45-degree angle or lower
[ ] Inspect surfaces for any issues (there shouldn't be any)
[ ] Document what worked for future reference
[ ] Restock supplies for next event

Why Sandbags and Duct Tape Keep Failing in Viral Videos
It's worth understanding why the traditional approaches keep showing up in failure videos.
Sandbags require advance planning, physical labor, and proper placement. Most homeowners don't have them on hand. Those who do often place them incorrectly—sandbags work by creating a continuous barrier, not by being stacked randomly against a door. They're also heavy, messy, and create disposal problems after the event.
Duct tape wasn't designed for water resistance. It's designed for HVAC ducts and temporary repairs. The adhesive breaks down when wet, and removing it often takes paint, finish, or surface material with it. The viral videos of duct tape failing aren't exceptions—they're the expected outcome.
Plastic sheeting alone doesn't seal anything. It needs to be secured at all edges, and the materials people typically use to secure it (duct tape, weights, sandbags) all have their own failure modes. Water finds the path of least resistance, and plastic sheeting has many such paths.
Permanent caulk works during the flood but creates a different problem: you can't remove it without damaging surfaces, and it looks terrible on doors and windows. It's also not designed for the kind of rapid application a flood emergency requires.
The common thread: these methods either fail at keeping water out, fail at removing cleanly afterward, or both.
The Real Lesson From Viral Flood Videos
Those millions of views aren't just disaster tourism. They're a warning and an education delivered straight to your phone.
Every flooded living room video started with a homeowner who thought it wouldn't happen to them, or who didn't have a plan, or who relied on improvised solutions that couldn't handle real water pressure.
The homeowners who don't end up in viral videos—the ones whose homes stay dry—aren't necessarily luckier. They're prepared. They identified weak spots before the flood arrived. They had the right materials on hand. They could seal entry points quickly without creating secondary damage.
FloodTape® exists because its inventor lived through fifteen years of Florida storms and got tired of the same cycle: sandbags that arrived too late, duct tape that ruined paint, caulk that worked once but couldn't be removed [3]. There had to be a better way.
There is. And now you know about it before you end up filming water pouring under your own front door.
Ready to protect your home before the next storm makes it onto your feed? Get FloodTape® now and be prepared for whatever the weather brings.
Frequently Asked Questions
Why are so many flood videos going viral on social media?
Flooding has become more frequent and intense in many regions due to changing weather patterns, while smartphone cameras ensure nearly every significant event gets documented. The combination creates a massive volume of dramatic, relatable content. These videos resonate because they show ordinary homes—homes that look like yours—filling with water in minutes. The relatability factor drives shares and views while inadvertently educating viewers about common vulnerability points in residential structures.
What are the most common entry points for floodwater in homes?
Based on both viral video evidence and professional assessments, the most vulnerable areas include exterior door thresholds (especially front doors and sliding glass doors), garage door seals, ground-level or basement windows, crawlspace vents, weep holes in brick exteriors, and floor drains. These entry points share common characteristics: they require gaps or seals to function normally, those seals degrade over time, and they often sit at or below grade where floodwater naturally collects and applies pressure.
How quickly can I seal my doors and windows before a flood?
With the right materials already on hand, sealing a standard exterior door takes approximately five to ten minutes. A complete home with two doors and several vulnerable windows can typically be protected in under an hour. The critical factor is having materials staged and accessible before warnings arrive—last-minute shopping during flood events often proves impossible due to demand and store closures.
Will flood protection tape damage my door frames or paint?
FloodTape® is specifically designed to create a strong seal against water while removing cleanly from surfaces including wood, glass, metal, stucco, and painted finishes. The key to clean removal is pulling the tape back slowly toward you at a 45-degree angle or lower once the flood threat has passed. Unlike duct tape or permanent caulk, this approach leaves no residue and doesn't damage underlying surfaces when used as directed [2].
How long can FloodTape® be stored before I need it?
FloodTape® maintains its adhesive properties for up to 24 months when stored in a cool, dry location away from direct sunlight. This makes it practical to purchase during the off-season and keep with other emergency supplies until needed. Each roll is compact and lightweight, requiring minimal storage space while providing significant peace of mind when storm season arrives.
About This Guide
This article was developed using flood protection best practices, FEMA guidance on residential flooding, and real-world experience from homeowners in flood-prone regions. FloodTape® was invented by Matthias Herzog after fifteen years of living through Florida hurricanes and testing every available flood protection method. The product represents a patent-pending approach to temporary flood barriers that prioritizes both effectiveness and clean removal without surface damage.
Cited Works
[1] Federal Emergency Management Agency (FEMA) — "Flood Insurance." https://www.fema.gov/flood-insurance
[2] FloodTape® — "FAQs for FloodTape® | DIY Flood Protection System." https://www.myfloodtape.com/faq
[3] FloodTape® — "About FloodTape® | Waterproof Flood Protection Tape." https://www.myfloodtape.com/about


Comments